
Creating components for Sitecore is straight forward. You usually create view, controller, model and repository classes and you are done. With Sitecore SXA it is even easier if you need component which has similar functionality as OOTB SXA component or component that you already created previously.
This post describes exactly this scenario. I will show you how to clone renderings / components with Sitecore SXA in more general way so you can use this post to help you out in these scenarios. This post is more detailed to the official Sitecore SXA documentation article about this topic -> Copy and customize a rendering.
What you can expect:
- Requirements
- Step 1: Information Architecture / Item & Template structure
- Step 2: Creating SXA module
- Step 3: Creating SXA component
- Step 4: Creating SXA rendering variant
- Step 5: Add module to site
- Step 6: Usage
- Step 7: Further tuning
- Conclusion
Requirements
We have received requirement to create Section List or Table of Content kind of component in Sitecore SXA. We have used Sitecore 9.1 and SXA 1.8 but the solution is not dependent on this version only. You only need to have SXA where Page List component is present or any other desired component (if you are not cloning Page List).
Component should be straight forward for Content Editors and generate links and other content automatically without there assistance.
Content Editors had to do only two things:
- Generate proper structure of items / pages
- Add component to proper page (See “Step 7: Further tuning” chapter to remove this need completely)
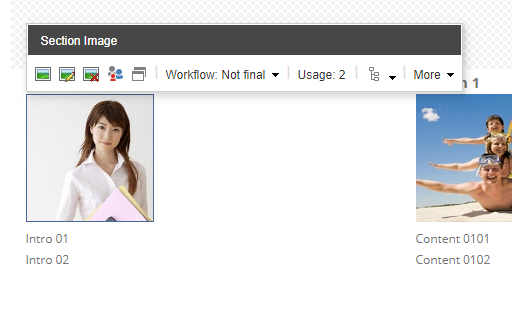
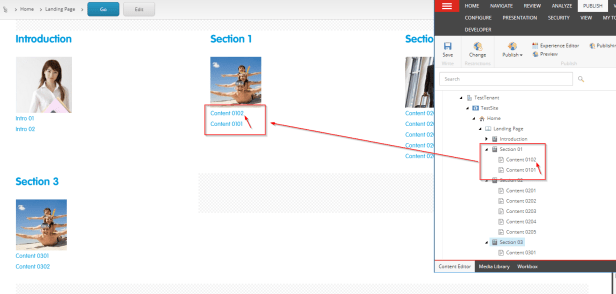
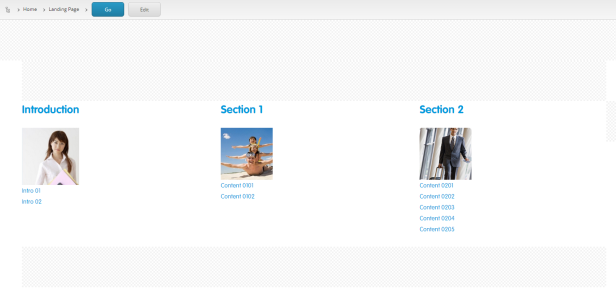
We aimed to create this kind of component:
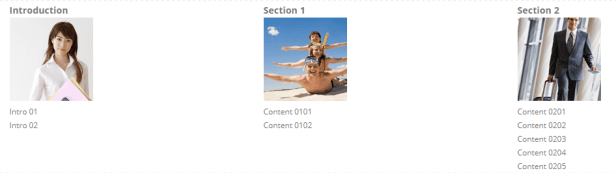
Component itself doesn’t have any wrapper / component markup. We will generate component markup for each section with its children:
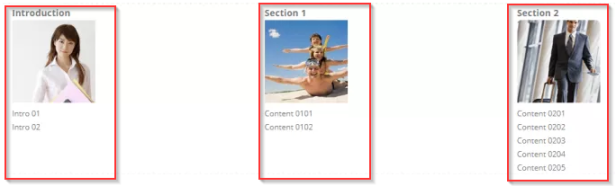
Each section represents Section Navigation Title (link to section), Section Image and links to pages that are below section.
Step 1: Information Architecture / Item & Template structure
This is how structure of items / pages looks like with some dummy content:
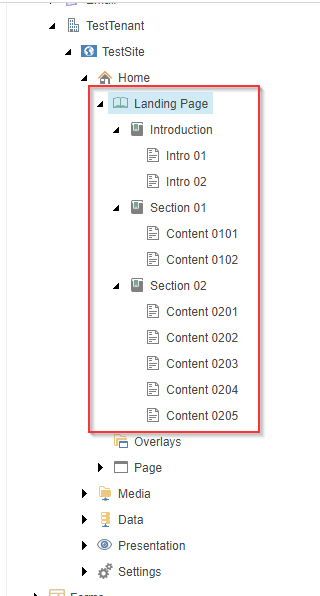
There is a Landing Page where this component is used. Below Landing Page there are Section Pages and below each Section Page there are Content Pages.
This is how the templates look like. All inherit SXA Page template under tenant templates:
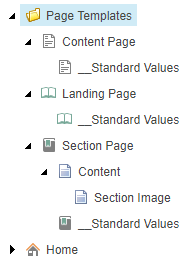
Section Page is a bit special as it contains “Section Image” field. This is regular shared Image field. Landing Page has Insert Options set to insert items based on Section Page template. Section Page on the other hand has Insert Options set to insert items based on Content Page template.
Step 2: Creating SXA module
So far common Sitecore stuff, huh?
Let’s finally do some SXA magic.
First let’s create module that will hold our new component. If you already have one, skip this step and continue with Step 3.
Navigate to /sitecore/system/Settings/Feature and create new folder. Name it based on your client name or your company name. I have used “TestModules”. This folder will hold all your custom modules.
Go back to /sitecore/system/Settings/Feature, right click and choose Insert > Module:
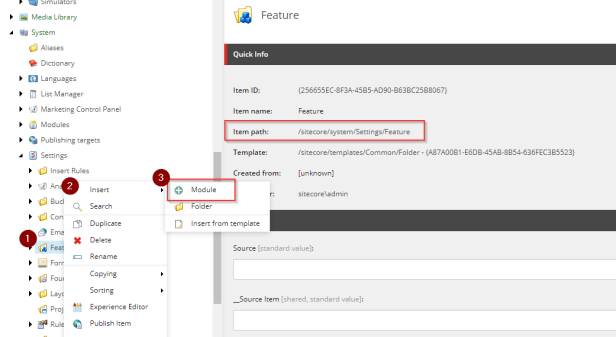
Specify Module name, select your “Feature/TestModules” folder in Add to module group field and uncheck Tenant Setup option in Module scaffolding actions as this is only Site related module. Keep everything else as it is by default:
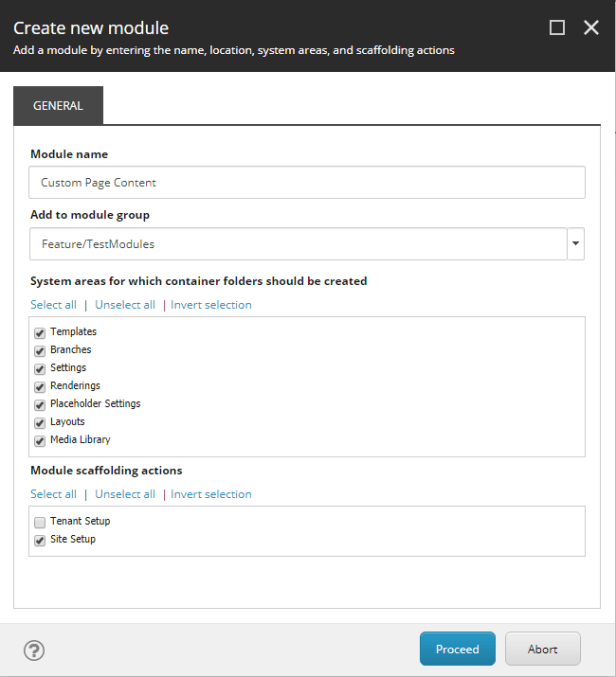
Click Proceed 🙂
Step 3: Creating SXA component
Creating component itself will be fast as we will clone existing Page List component which is part of SXA. We will only do some slight modifications.
In Content Editor, navigate to /sitecore/layout/Renderings/Feature/Experience Accelerator/Page Content/Page List . Right click on this item > Scripts > Clone Rendering : 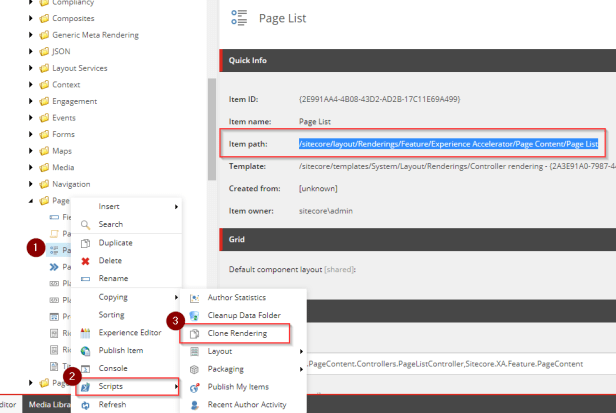
Specify Rendering name and module that you would like to add your rendering to:
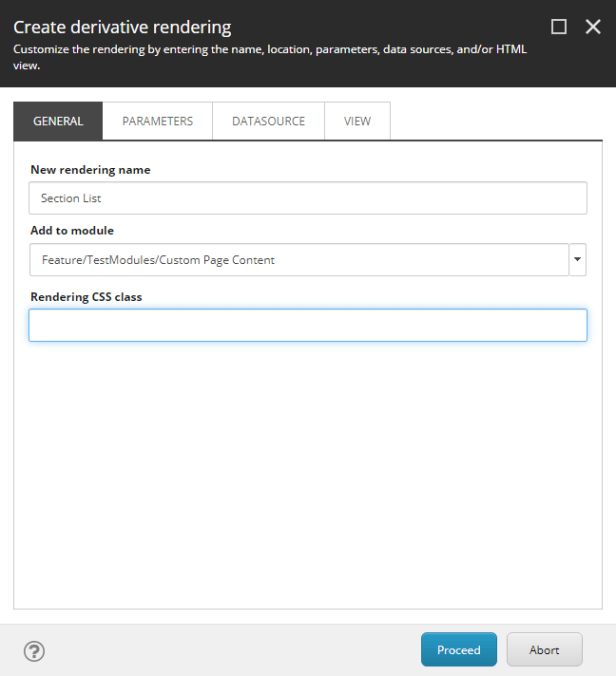
I left Rendering CSS class empty as I am not applying any special CSS there.
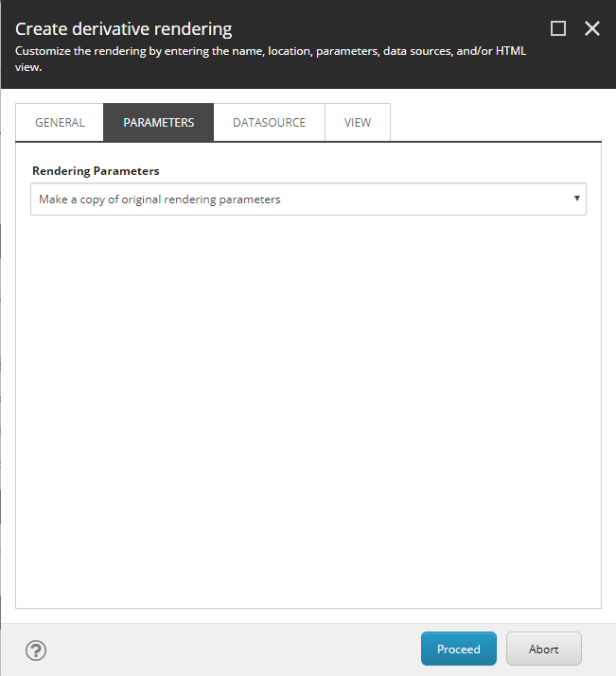
Switch to Parameters tab and select “Make a copy of original rendering parameters”:
Switch to Datasource tab and select “Make a copy of original datasource”:
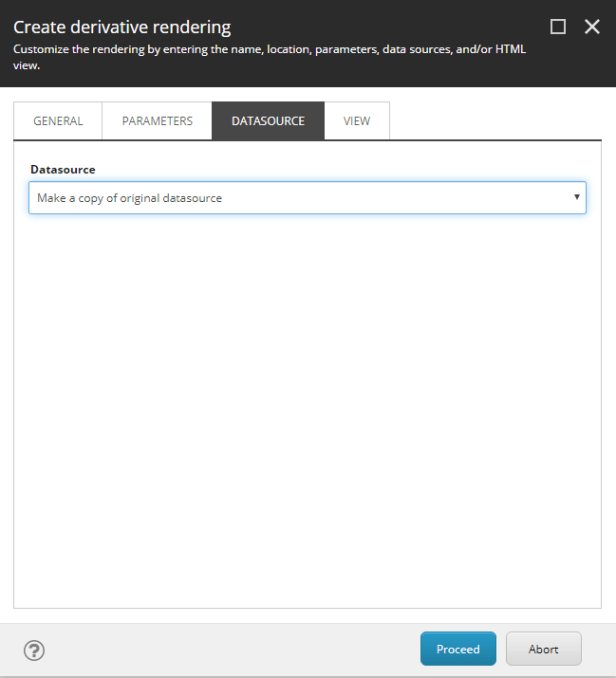
You can also use existing original rendering parameters and datasource in previous two tabs. No need to make copies of them if you are not extending them in the future.
Before we switch to View tab go to Windows Explorer and duplicate Page List Rendering. Navigate to your Sitecore instance folder and Copy & Paste “Views\PageList” folder. Rename it to “Section List” or anything that is desired to you. Rename also .cshtml view file to something more meaningful.
Open “Section List.cshtml” in Code Editor and remove all (highlighted below) surrounding HTML and ul and li tags like this:
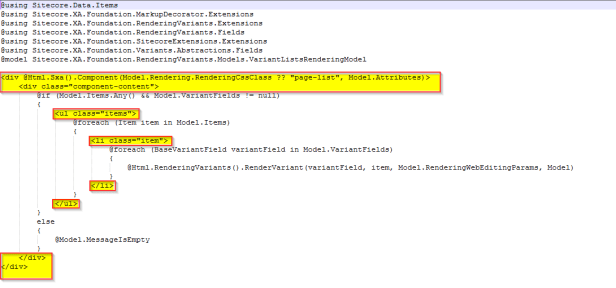
Original Page List.cshtml:
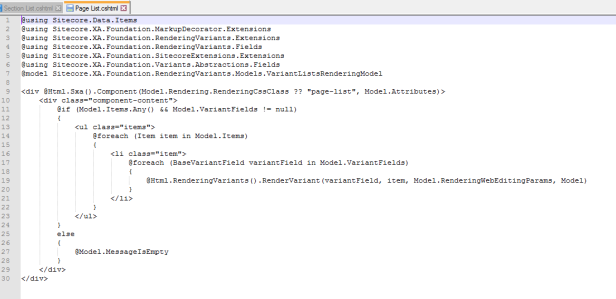
Our Section List.cshtml after adjustments:

We will leave HTML markup generation on Rendering Variant in next step. Have no worries.
Now is the time to get back to Content Editor and finish wizard. Switch to View tab and select “Select existing MVC view file” from View dropdown. Do not forget to specify path to your Rendering View:
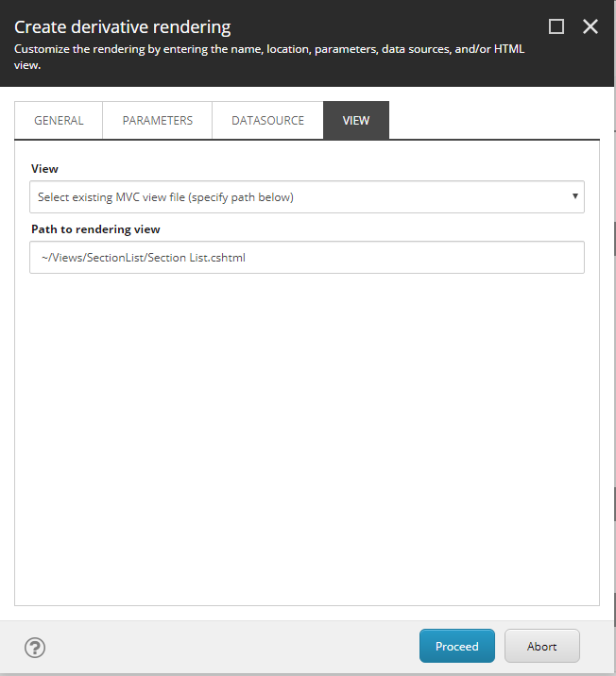
Click Proceed . Congrats! Cloned rendering has been created.
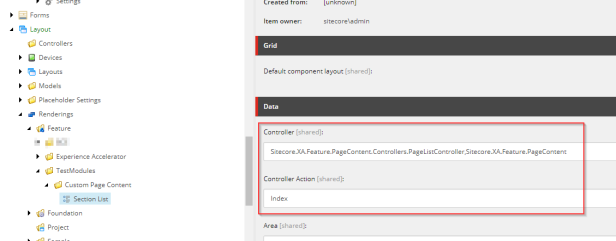
Check /sitecore/layout/Renderings/Feature/TestModules/Custom Page Content/Section List item. We are reusing logic from Page List component. No need to create your own controller or other usual classes 😉
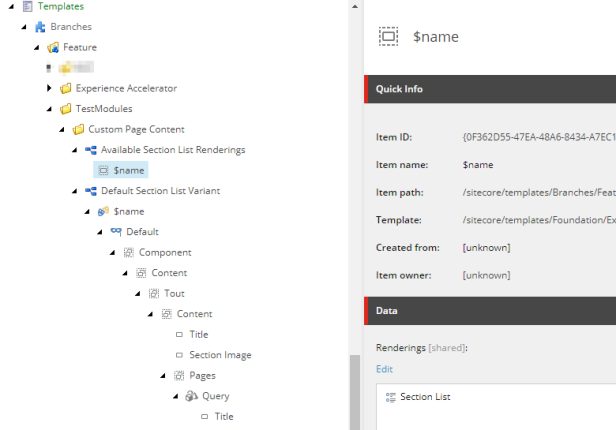
Step 4: Creating SXA rendering variant
Navigate to /sitecore/templates/Branches/Feature/TestModules/Custom Page Content/Default Section List Variant/$name/Default and remove Title item under Default:
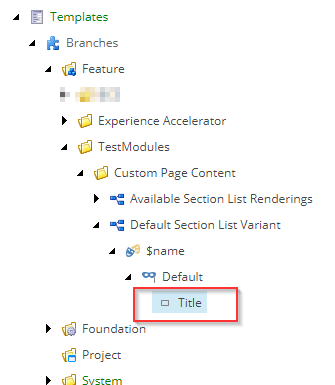
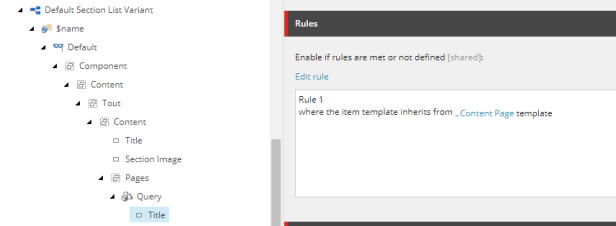
Aim is to have this structure at the end:
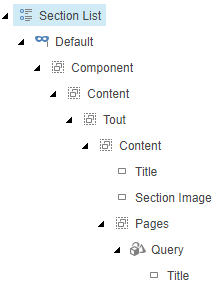
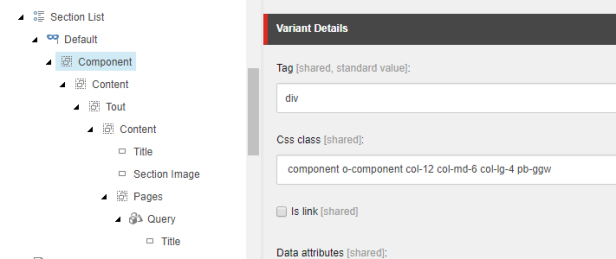
Therefore create “Component” Section Variant under Default item:
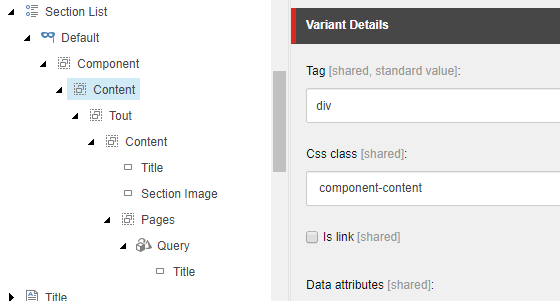
Underneath “Content” Section Variant:
We have also created “Tout” and another “Content” Section Variants beneath which are just divs with special CSS classes. You don;t need to create them if you don’t need them.
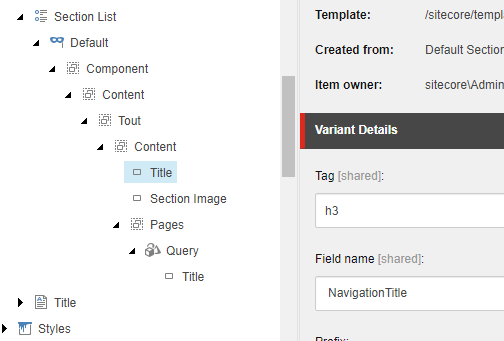
Then we have created “Title” Field Variant with h3 as tag and field name specified as NavigationTitle. We wanted to use NavigationTitle instead of Title so it can be shorter then slightly bigger Title field value:
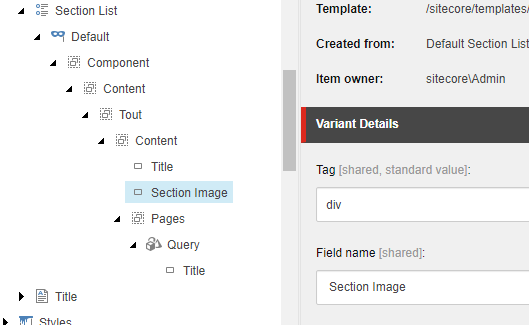
Section Image is straight forward. Again Field Variant:
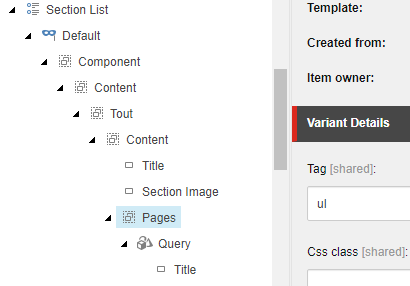
Pages is just another Section Variant with ul tag:
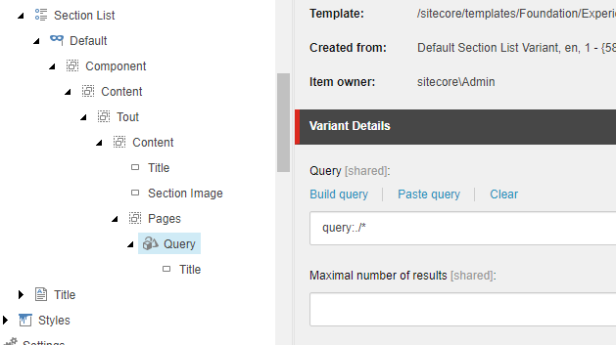
Query is pretty simple. It is based on Query Variant with Query field value “query:./*”. This will query for children items (in our case Content Pages):
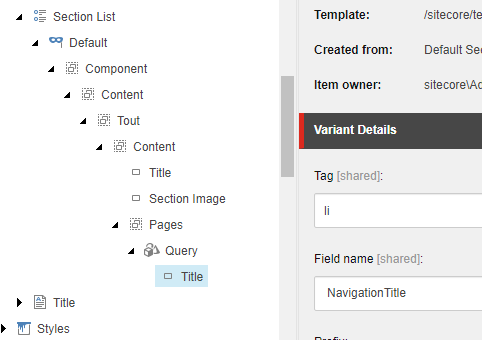
Last field is Title with simple definition of Field Variant with li tag and NavigationTitle:
This is how your branch template should look like at the end. Make sure Section List is specified in $name item:
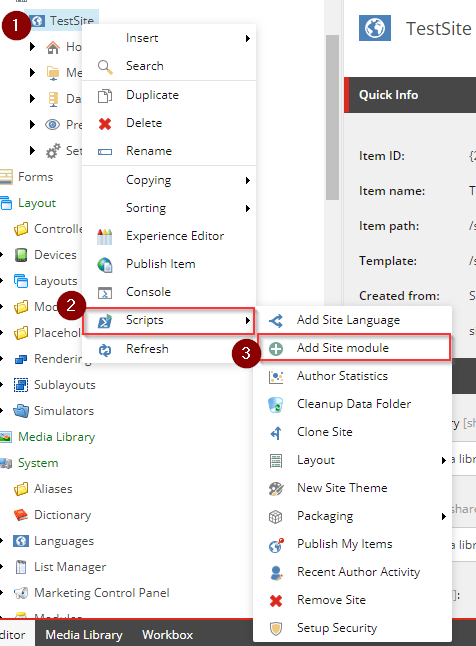
Step 5: Add module to site
Now let’s add new module to our site. Right click on site item > Scripts > Add Site module:
You should see your module in list of available modules in wizard:

Check/uncheck modules that you want to add/don’t add and hit OK button.
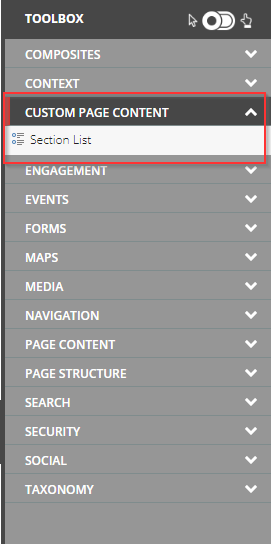
Step 6: Usage
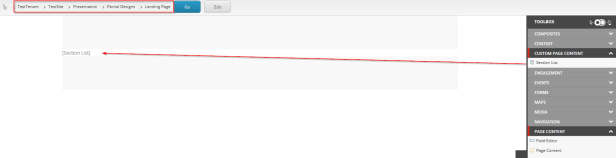
You should see your newly created component in Toolbox under Custom Page Content:
You can just drag and drop component to main placeholder in “Landing Page” page and you will get results immediately.
Content Editors can change content directly within component itself.
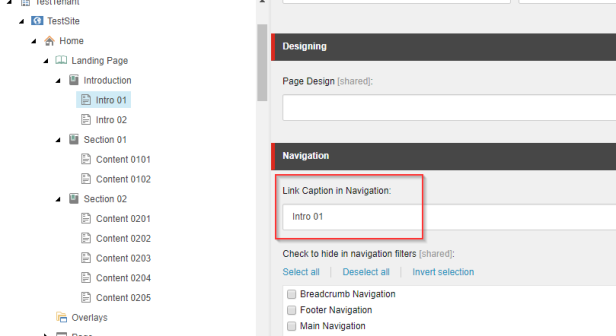
By changing Link Caption for page:
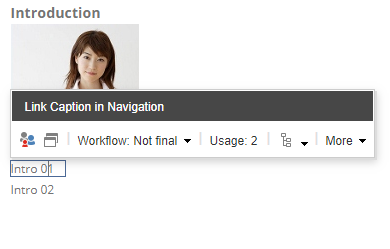
Content Editors will effectively change this SXA OOTB field:
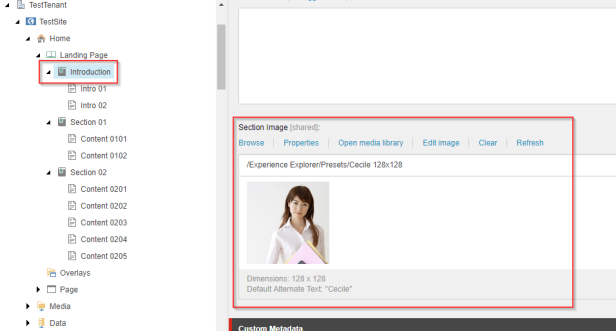
By specifying Section Image
Content Editors will effectively change special field that we added to Section page template:
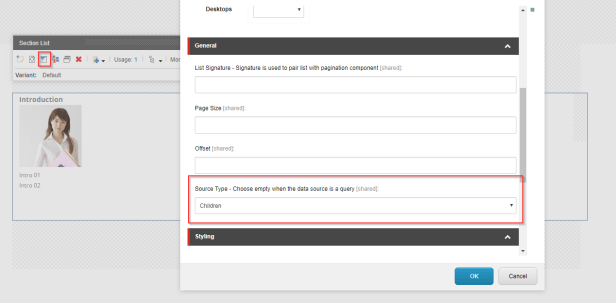
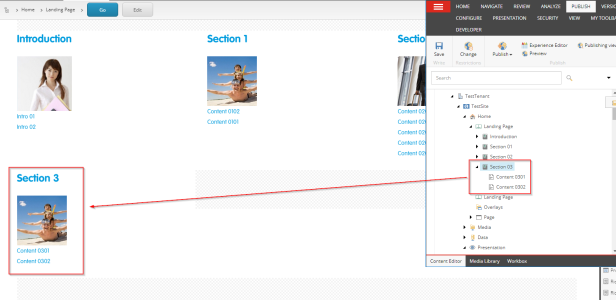
Magic happens as by default Children items are taken in account as source types for this component. You can create queries and it will still work if you specify them correctly:
Component is aware of order of items so if you change order, content will be automatically moved also:
Also when new sections are created, content is adjusted without need of adding it by Content Editors manually (really great Table of Content not like in MS Word which you need to update all the time 😉 :
Step 7: Further tuning
You can even increase usability further for Content Editors if you add this component to Landing Page Partial Design & create also specific Page Design that uses that Partial Design:
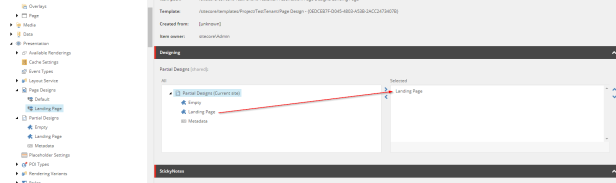
and assign / map page design for that template:
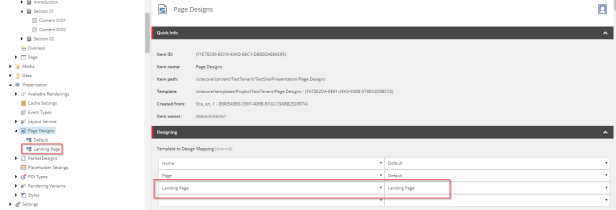
Then, if Content Editors create new Landing Page, page will automatically contain this component and also content will be there:
In this case it makes sense to remove permissions for Content Editors for that component or remove Available Renderings for this module as they shouldn’t add it by themselves anywhere else then to this page template. Expect a separate blog post about this soon.
You can also make it more error prone by creating interface templates (not to break Helix for Section Page and Content Page which will be inherited by corresponding templates) and setting appropriate rules on variants to also showing only pages that are needed:
Conclusion
Hopefully you liked this post and it helped you understand how to create components based on existing OOTB SXA components.
Sorry for longer article but I wanted to do it detailed. Thanks for bearing with me until the end 🙂
Happy cloning (SXA components)!

Hi Peter,
Thanks for the nice article.
I have a requirement which I need to add a placeholder inside the page list query. I have tried adding placeholder inside the query. Its generating the same placeholder key for all the items of the page list. So when I add a component in the page for any placeholder, it is also reflecting to the other placeholders.
I am using the same structure of your demo.
Please help me on this.
LikeLike
Thanks for the comment Vignesh. I would try to add Placeholder through rendering variant as Placeholder renderer or in the View file itself. Question is whether users should be able to add two or more components like this to page? Probably IMHO not therefore there should be always only one component like this on page and also one placeholder for your other component
LikeLike