

I was really pleased when I noticed on Friday morning (13th July) that the long awaited Update 2 for Sitecore Experience Commerce 9 (SXC 9) was released with long list of enhancements and additions. I was probably the first one to inform about this on Twitter 🙂
I really like the pace with which the SXC 9 is released following just couple of weeks after regular platform updates for Sitecore 9 (SC 9). SXC 9 prerequisites are always latest update of Sitecore and latest SXA which is really great and cool. With this approach you can have your Commerce solutions up to date with latest Sitecore and Sitecore modules.
I was very excited when Sitecore Experience Commerce 9 was released in February this year and I have immediately created a VM and played with it. I have afterwards upgraded this VM with SXC 9 Update 1 and prepared for Sitecore Commerce Essentials Certification which I have successfully passed.
I was eagerly waiting this Update 2 and seems that almost all features that were missed by community for Initial release and Update 1 are available finally. Versioning, Workflows, Enhancing entities with Entity Composer, and many more new / enhanced features have been introduced in this Update 2.
If you have installed SXC before (either Initial Release or Update 1) there are three main differences for Update 2:
- Sitecore has been updated to version 9 Update 2
- SXA has been updated to latest version 1.7.1
- No need to stop xConnect site during installation.
Enough written. Let’s get to more interesting stuff – Do the installation!
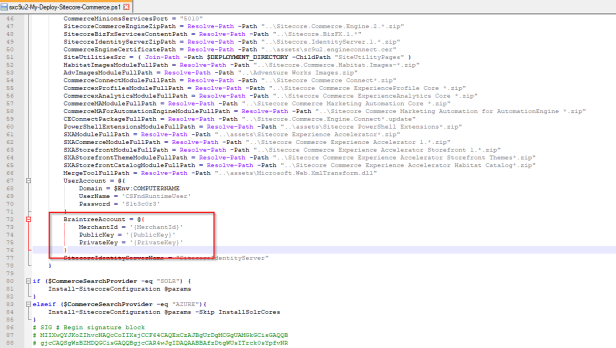
1) Braintree sandbox account
You need a Braintree sandbox account to enable web payment functionality through the Commerce Engine. Follow the instructions on the Braintree website to set up an sandbox account, and note the MerchantID, Public Key and Private Key information. You need to specify the values for those parameters in your Sitecore XC deployment script in step 6.
2) Installing prerequisites
– Create “C:\deploy” folder on your machine. You can use your preferred location but adjust below configuration and paths accordingly!
– To run Sitecore Experience Commerce 9 (SXC9) you need to have instance of Sitecore 9.0.2 (Sitecore 9 Update 2) up and running.
If you haven’t done that so far, follow my blog post to help you out. For Commerce 9 installation purposes, please create Sitecore instance with prefix “sc9u2” or choose your own name /prefix.
If you choose your own name or you already have one instance up and running, change configuration and names below according to your setup.
– Download and Install .NET Core 2.0 – I have downloaded .NET Core 2.1.4 SDK from this link.
– Download and Install .NET Core Windows Server Hosting 2.0.0 – I have downloaded it from this link.
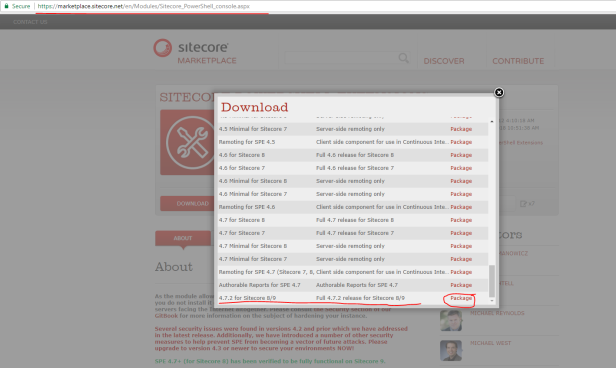
– Download Sitecore Powershell Extensions 4.7.2 from Sitecore Marketplace. Do not install package at this point!
Copy downloaded file into folder “C:\deploy\assets”.
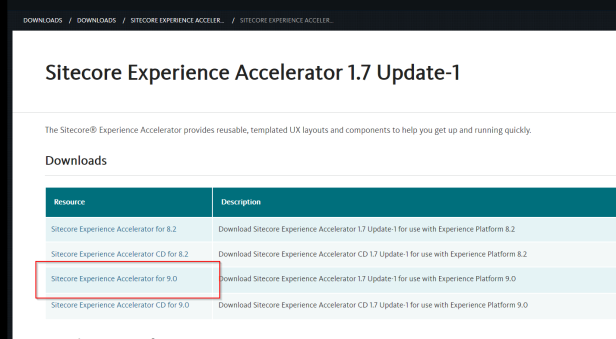
– Download Sitecore Experience Accelerator 1.7.1 from its download site or from this direct link. Do not install package now!
Copy downloaded file into folder “C:\deploy\assets”.
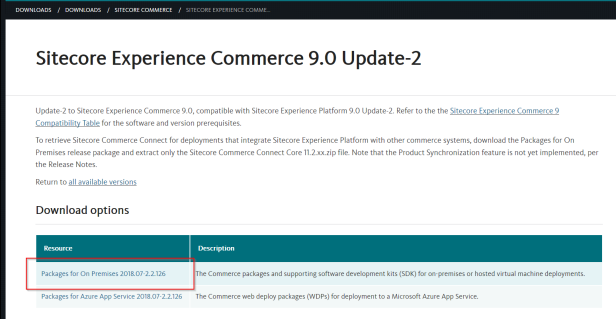
– Download the Sitecore XC Update 2 release package and prerequisites from it’s download site or from this direct link.
Copy downloaded zip file into folder “C:\deploy\”.
– Extract the content of the zip file onto the environment from which you are going to deploy Sitecore XC. In my case I have extracted zip file “C:\deploy\Sitecore.Commerce.2018.07-2.2.126.zip” directly into “C:\deploy”
The extraction process resulted in multiple .zip files in folder “C:\deploy”.
Remove “Sitecore.Commerce.2018.07-2.2.126.zip” file from folder “C:\deploy” as it is no longer needed.
– Go to the folder where you extracted the zip files (in my case, c:\deploy)
and unzip the following files:
- SIF.Sitecore.Commerce.1.2.14.zip
- Sitecore.Commerce.Engine.SDK.2.2.72.zip
- Sitecore.BizFX.1.2.19.zip
Make a note of the destination folders. You must specify the path to their locations in the Sitecore XC deployment script. Leave all other files in the release package zipped. If you are following this post, you don’t need to mark paths of files as in my deployment script in the end, all is set properly.
For me paths to those folders where:
- C:\deploy\SIF.Sitecore.Commerce.1.2.14
- C:\deploy\Sitecore.Commerce.Engine.SDK.2.2.72
- C:\deploy\Sitecore.BizFX.1.2.19
Remove “SIF.Sitecore.Commerce.1.2.14.zip”, “Sitecore.BizFX.1.2.19.zip” and “Sitecore.Commerce.Engine.SDK.2.2.72.zip” zip files from folder “C:\deploy” as they are no longer needed and they would break installation as ps1 script would find folder and also zip files with same name as use that as array not string…
– Download MSBuild Microsoft Visual Studio Web targets from nuget
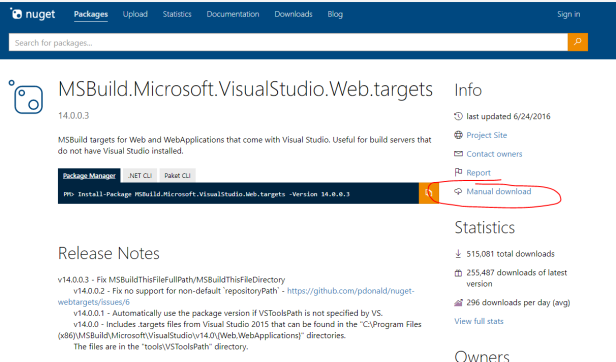
Change extension of downloaded file from “nupkg” to “zip” and extract file “Microsoft.Web.XmlTransform.dll” from path \tools\VSToolsPath\Web in that zip file.
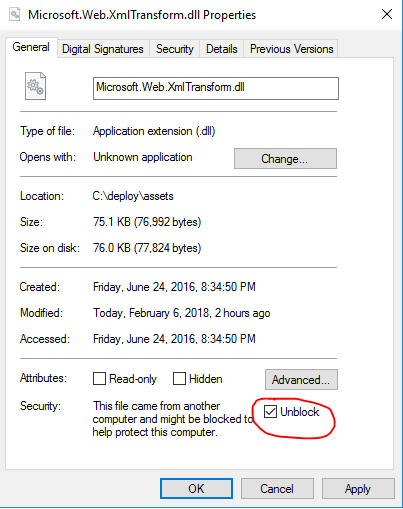
Copy “Microsoft.Web.XmlTransform.dll” file into “c:\deploy\assets”.
Don’t forget to unblock this file!
– Copy file “C:\deploy\Sitecore.Commerce.Engine.SDK.2.2.72\Sitecore.Commerce.Engine.DB.dacpac” into “C:\deploy\assets”
– Unzip “C:\deploy\Sitecore.Commerce.Engine.2.2.126.zip” into “C:\deploy\Sitecore.Commerce.Engine.2.2.126” folder and open “C:\deploy\Sitecore.Commerce.Engine.2.2.126\wwwroot\bootstrap\Global.json” file.
- Set the “Database” value under “SourceStoreSqlPolicy” to “SitecoreCommerce9_Global”
- Set the “Server” value under “SourceStoreSqlPolicy” to “.”
- Zip the folder “C:\deploy\Sitecore.Commerce.Engine.2.2.126” as “C:\deploy\Sitecore.Commerce.Engine.2.2.126.zip” file overwriting the existing file “C:\deploy\Sitecore.Commerce.Engine.2.2.126.zip”.
- Remove “C:\deploy\Sitecore.Commerce.Engine.2.2.126” folder afterwards
3) Create a certificate for Sitecore Commerce Engine Connect
You must create a certificate for the Sitecore Commerce Engine Connect to authenticate with the Sitecore XC Engine.
To do so:
- Launch PowerShell as an administrator.
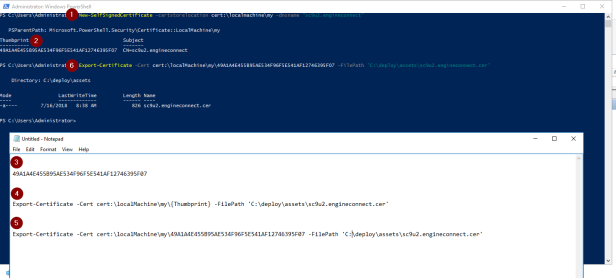
- Create the certificate by running the following cmdlet:
New-SelfSignedCertificate -certstorelocation cert:\localmachine\my -dnsname “sc9u2.engineconnect”
and mark down generated Thumbprint.
- Export the certificate to a file by running the following cmdlet:
Export-Certificate -Cert cert:\localMachine\my\{Thumbprint} -FilePath ‘C:\deploy\assets\sc9u2.engineconnect.cer’
Instead of {Thumbprint}, place your certificate thumbprint from 2. step
e.g.
Export-Certificate -Cert cert:\localMachine\my\49A1A4E455B95AE534F96F5E541AF12746395F07 -FilePath ‘C:\deploy\assets\sc9u2.engineconnect.cer’
4) Verify deploy folder
Before proceeding with installation, let’s verify file listing of deploy folders.
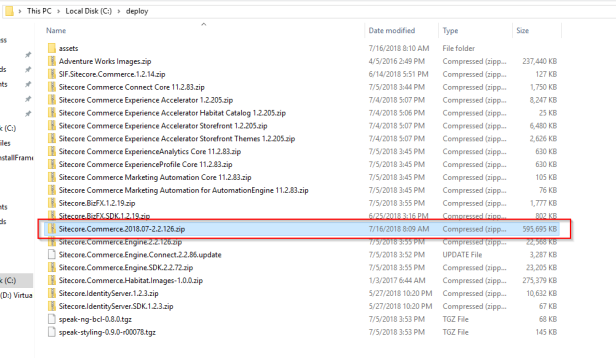
File listing for “C:\deploy” folder:

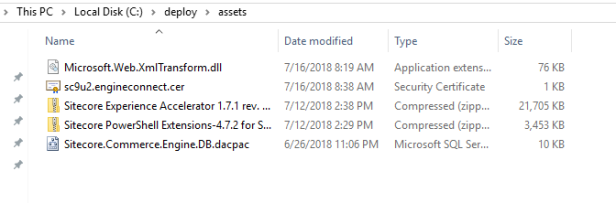
File listing for “C:\deploy\assets” folder:
5) Verify Sitecore Installation
Before proceeding with installation of SXC 9 Update 2, you need to verify your Sitecore instance where you intend to deploy it.
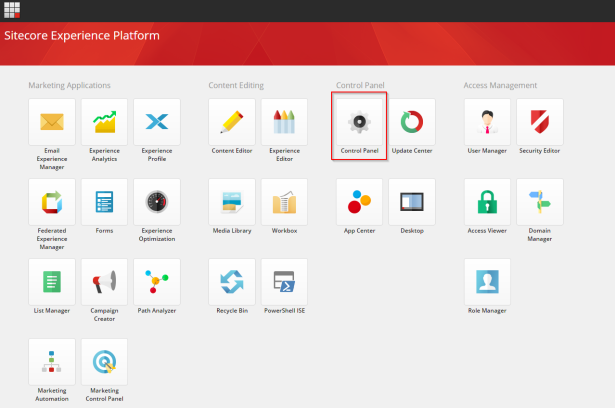
Log into your Sitecore instance and navigate to Control Panel from Launchpad:
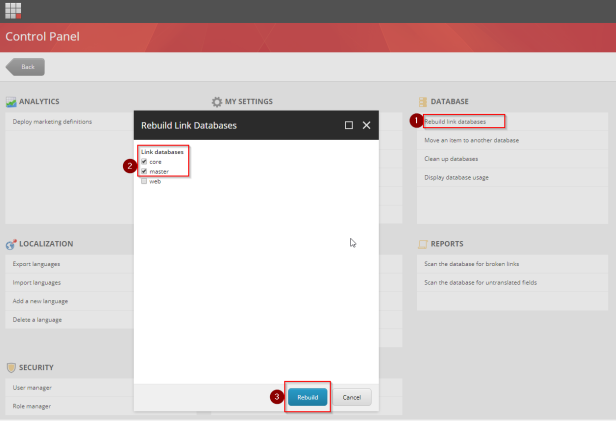
Rebuild master and core link databases by opening “Rebuild link databases”, selecting “master” and “core” databases and hitting “Rebuild” button:
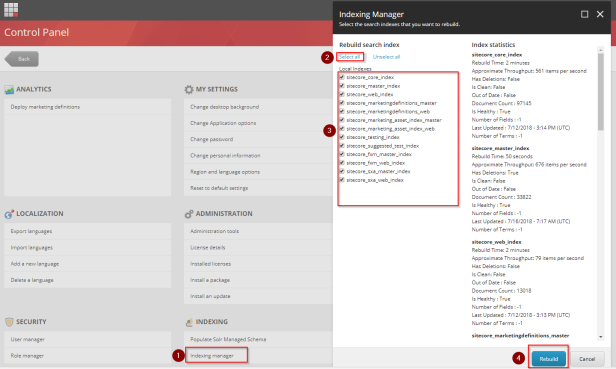
Make sure that Solr server is up and running by rebuilding search indexes. From “Control Panel” open “Indexing Manager” in “Indexing” section, check all indexes by hitton “Select all” button, verify that all indexes are selected and then hit “Rebuild” button:
If all operations where successful, you can proceed to next step.
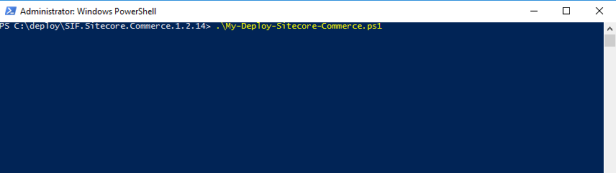
6) Running deploy script
Use my deployment script which is customized to names and paths used in this blog post.
If you followed me or just want to really quickly get valid deployment script, grab Powershell script from here.
Download and copy it into c:/deploy/SIF.Sitecore.Commerce.1.2.14 folder or folder where you have extracted SIF zip file in previous steps.
Do necessary changes or / and just update Braintree credentials received in step 1:
Run it using PowerShell:
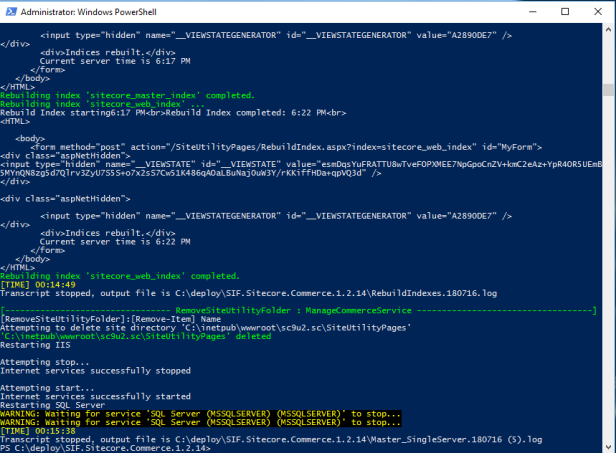
Take a coffee (or tea as in my case) or two as it will take some minutes to finish.
I have encountered only two exceptions during installation / deployment of script and that were:
- “The service cannot accept control messages at this time”. I have quickly resolved it by starting my stopped Sitecore site from IIS Manager. Maybe you need to also start application pool. After that I have run the script once again. -> See more details here.
- “Request timed out” on PublishExtensions Task -> See resolution here.
Seems that these are known issues (See section “known issues”) from this great blog post by Viet Hoang. But the second one I had to resolve by myself.
This is what you should see at the end:
7) Post Installation steps
Follow chapter 4 from Installation guide (link can be found at the end of this article) to finish all post-installation steps.
Chapter 4.1 – Configure user accounts :
Follow documentation to set roles for appropriate users to access Business Tools. By default “admin/b” is created with all roles. Note that every Sitecore XC user who requires access to the Business Tools must have the Commerce Business User role assigned, at a minimum. For full list of roles that are in the Commerce 9 Update 2 refer to this great blog post about roles by Rob Earlam. Installation guide seems to be a bit out dated regarding roles at the time of writing this blog post.
Chapter 4.2 – Theme selection:
8) Verify installation
– Run Sitecore and SXA Storefront
Launch Sitecore by navigating to http://sc9u2.sc/sitecore/ or your custom url where you have installed Sitecore instance.
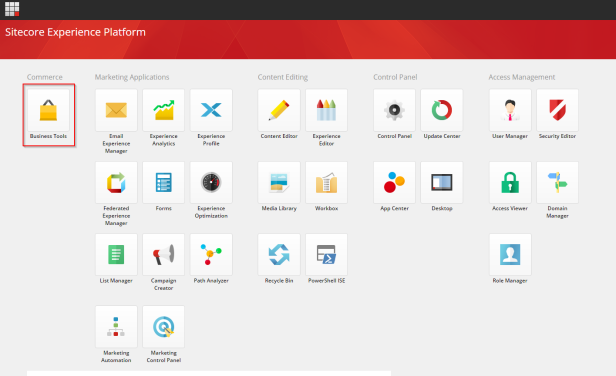
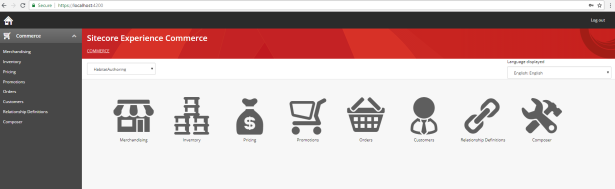
Open Sitecore Launchpad and you should see new “Business Tools” application:
If you click on it, it will open new tab with Sitecore Commerce Business Tools Login screen:
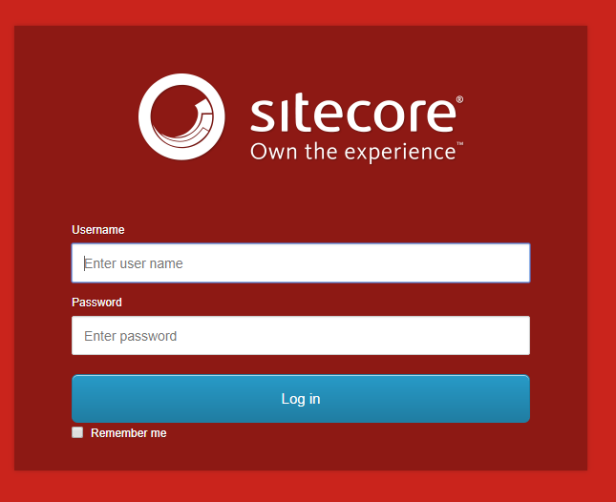
You need to log in with your admin credentials or with user that has “Commerce Business User” role assigned, at minimum.
Just type in admin/b as credentials. See Chapter 7) Post-Installation steps for further details. And you are in:
You can also verify SXA Storefront by navigating to https://sxa.storefront.com in new Incognito / Private tab:
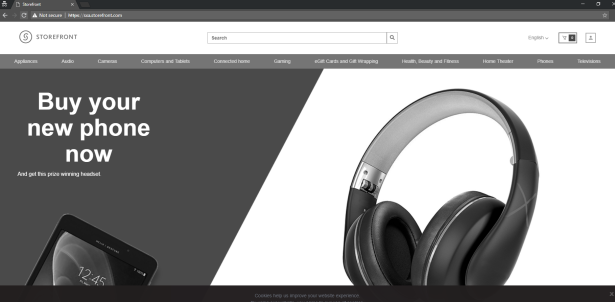
You can change theme to make it more colorful. See my post here on how to do it.
And result is like this:

Pretty catchy right?!
Good luck with the installation!
——————————————————
Useful links:
- Very good troubleshooting steps for SXC 9 Update 2 by Viet Hoang
- Entity Composer in Commerce 9 Update 2 by Rob Earlam
- Versioning in Commerce 9 Update 2 by Rob Earlam
- Workflow in Commerce 9 Update 2 by Rob Earlam
- Security Roles in Commerce 9 Update 2 by Rob Earlam
- Reporting in Commerce 9 Update 2 by Rob Earlam
- Sitecore XC 9.0.2 – What has been changed? by Christian Hahn
——————————————————
Used sources:

Great post! Helped me a lot more than Sitecore’s own installation guide.
You have a broken link to your PowerShell script and the Server-variable in the SourceStoreSqlPolicy-section seems to be missing a value.
LikeLike
Thanks Esben. That’s the exact reason why I have made this post, to help others 🙂 Also thanks for reporting small issues. I have done some reorganization in my github repository and forgotten to change link here. Also Server variable is now correct.
LikeLike
The screen shot for confirming the deploy folder is wrong. In step 2 you said, “Remove “SIF.Sitecore.Commerce.1.2.14.zip”, “Sitecore.BizFX.1.2.19.zip” and “Sitecore.Commerce.Engine.SDK.2.2.72.zip” zip files from folder “C:\deploy” as they are no longer needed and they would break installation as ps1 script would find folder and also zip files with same name as use that as array not string…” however the screen shot shows these zip files still in the deploy folder.
LikeLike
Thanks David. Good catch. Fixed!
LikeLike
Peter it didn’t work. Still shows the sitecore default page. I do see that when using https, it warns about certificate error.
LikeLike
Check in IIS whether you have https://sxa.storefront.com for 443 port and http://sxa.storefront.com for 80 port defined as binding to your Sitecore instance. If yes, then I would recommend creating a question on Sitecore StackExchange -> https://sitecore.stackexchange.com/
LikeLike
Hi Peter,
I was able to install XC 9.0.2 successfully. I am able to get to localhost:4200 and logn. However https://sxa.storefront.com site won’t display in the site above. It shows the sitecore default site. What can be wrong?
LikeLike
Try to smart publish whole site and then rebuild master and web indexes
LikeLike