
When you are starting or already doing development with Sitecore Experience Commerce 9 (SXC 9), it is crucial to also leverage capabilities of Postman and collections that were well prepared by SXC dev team. They will not only help you with initializing and bootstrapping environments but you will have access to and you will be knowledgeable of all API requests that SXC roles can provide to you.
I have already written some blog posts on how to work with and set up Postman but they were more reactions to problems that I have encountered during preparation of dev environment. You can find in them instructions on how to authorize requests in Postman and how to import collections from Commerce SDK into Postman.
In this blog post I will combine these blog posts with some additional insights and settings that should get you up to speed with working with Postman and Sitecore Commerce 9.
UPDATE: If it’s easier for you to watch and follow videos, then you have also option to watch Akshay Sura’s youtube video that he made following this blog post ->
If you haven’t installed Postman so far, now it is the best time. Use this link to download it and install it afterwards.
Let’s get started with more interesting things then!
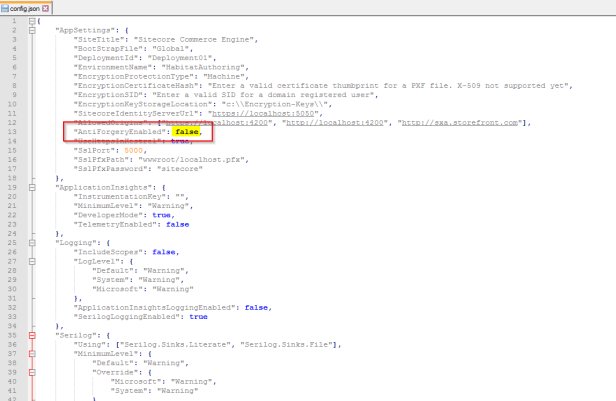
Step 1: AntiForgeryEnabled settings
This is the only setting that needs to be done outside Postman. By default it is set to “true” to preventing Cross-Site Request Forgery (CSRF) attacks.
This setting needs to be disabled in your dev environment. You disable it by setting its value to “false”. Do not forget to leave it on “true” on all production environments!
Go to “{path_to_your_commerce_authoring_site}/wwwroot/config.json” e.g. C:\inetpub\wwwroot\CommerceAuthoring_scx9\wwwroot\config.json and set “false” for “AntiForgeryEnabled” setting that is located under “AppSettings” node:
You need to follow all remaining steps in this guide and especially step 6 with bootstrapping Sitecore Commerce as settings from this step are applied only after bootstrapping environment.
Pro Tip: Use Notepad++ and it’s JSToolNPP plugin to format config.json.
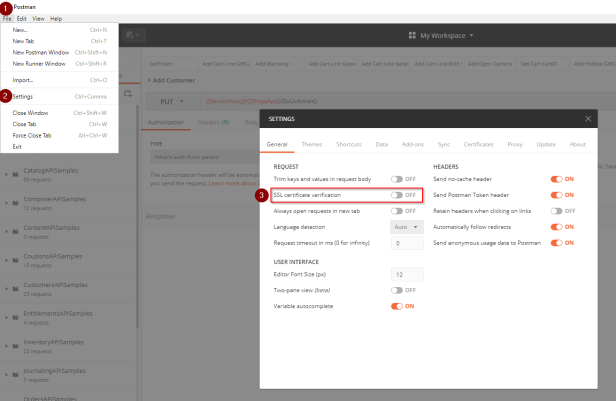
Step 2: Disable SSL certification verification
By default SSL certification verification is enabled in Postman.
You need to disable it to be able to execute calls toward Sitecore Commerce Engine as you are probably using self-signed certificates which are not supported in this case.
Go to “File > Settings > SSL Certification verification” and turn it OFF:
Step 3: Import Postman Commerce collections
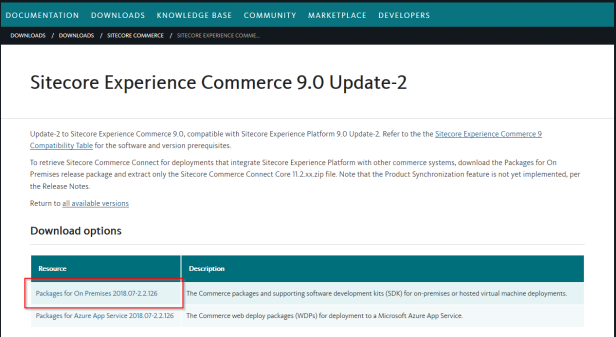
Before starting with any tasks described below, you need to download installation package for version of SXC that you are using.
For me it was the latest and greatest SXC 9 Update 2 for which installation package can be found here.
You need to choose appropriate package based on your installation. I have chosen “Packages for On Premises” as my installation was on premise. You probably have this package already as you have probably already installed Sitecore Commerce…
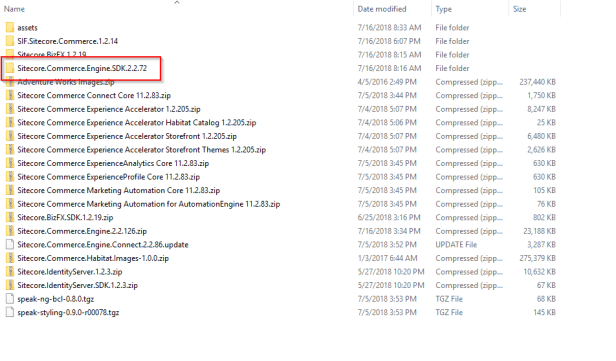
When download finishes, unpack downloaded zip file and extract “Sitecore.Commerce.Engine.SDK.2.2.72.zip” from installation package to separate folder.
In Postman click “Import” button on the top, then “Import Folder” tab and “Choose Folders” button.

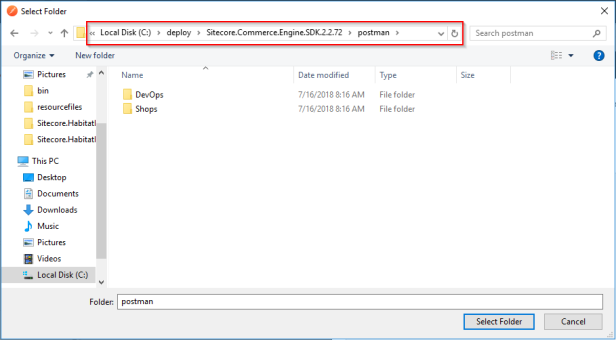
Select path to postman’s sub folder from newly extracted zip file (for me it was “Sitecore.Commerce.Engine.SDK.2.2.72\postman”) and hit “Select folder” button:
You should see green notification bars popping up.
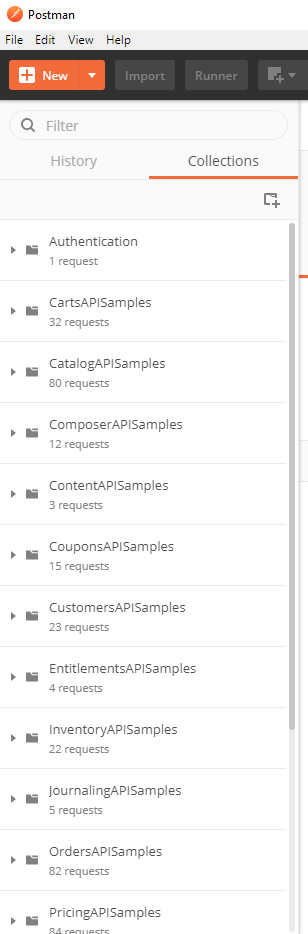
All postman collections and scripts should be imported successfully if you can see new collections in “Collections” pane:
Step 4: Get / Set Token for further communication
You always need to do this step whenever you start a new session in Postman or come back to Postman after a while as security token is invalidated after certain period of time.
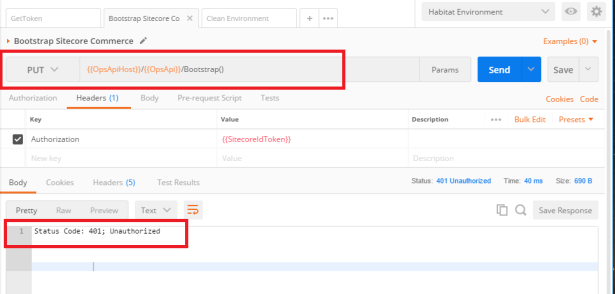
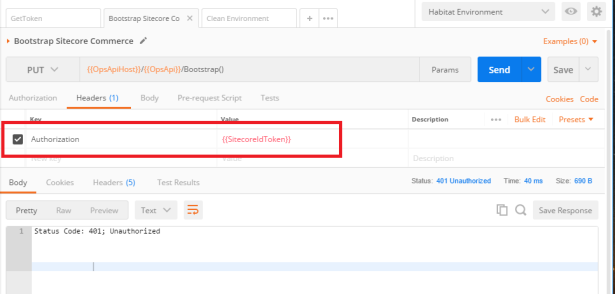
You need to generate security token from Sitecore Identity Server and save it as Global variable “SitecoreIdToken” in Postman. For any subsequent commands that you execute, this global variable will be used. Commands are prepared for this by using {{SitecoreIdToken}} in Authorization key in Headers section of requests. You don’t need to generate and set this token for every single request. You just need to run it when you receive 401 HTTP Status Code response ‘Unauthorized’:
Token is required for any request that requires authorization. Requests that need authorization are dependent on global variable “SitecoreIdToken” and you can see this in Headers tab of requests where {{SitecoreIdToken}} is used for Value field:
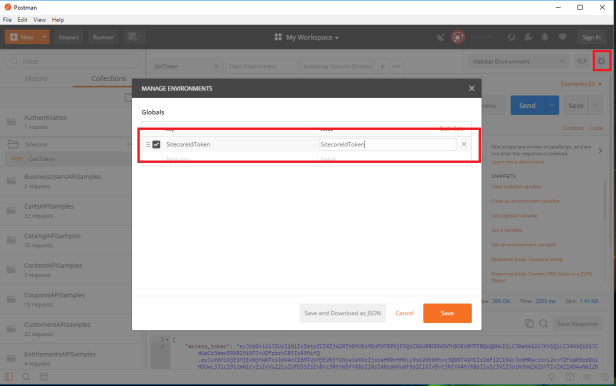
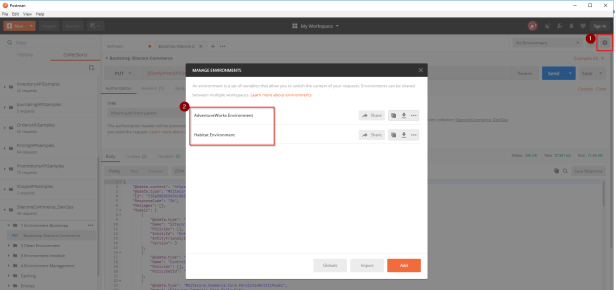
To create global variable with name “SitecoreIdToken”, open Environment settings (button below Sign In on the right side of the screen). Go to “Globals” and add new key “SitecoreIdToken” with key “SitecoreIdToken”. If you have already created it previously, you don’t need to do it again:
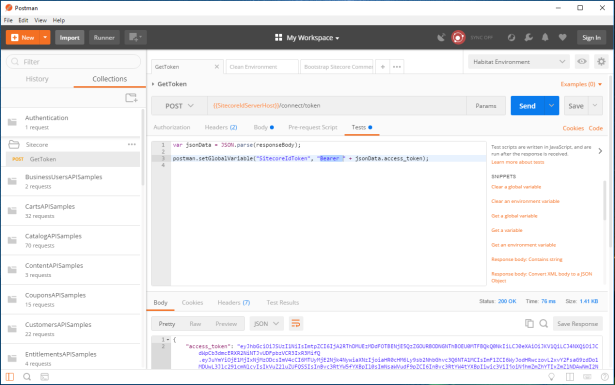
Switch to “Collections” pane and open “Authentication” collection. Expand “Sitecore” section and click “GetToken”. Switch to “Tests” tab in the command and click on blue “Send” button to get authorization token and save it as global variable “SitecoreIdToken”.
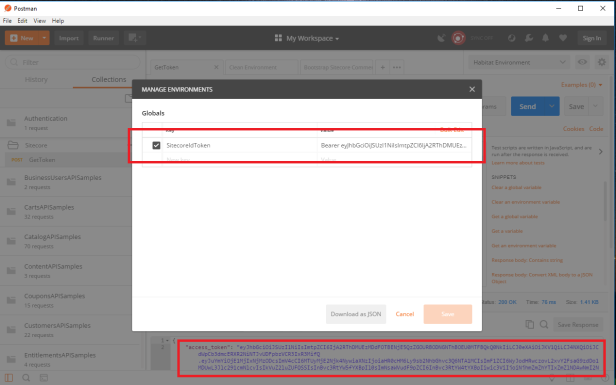
Now go back to “Globals” and check value of newly created Global variable “SitecoreIdToken”. It should be changed and have “Bearer ” + access_token value as a Value:
Now all requests that need authorization will be authorized 🙂
Token will be invalidated after some time as I have already mentioned so if you see exception ‘Status Code: 401; Unauthorized’, just follow above instructions from this step and you are good to go 😉
Step 5: Further Postman settings
If you have installed SXC 9 Initial Release (or any other Update) on your dev environment with default settings for ports and your Commerce sites are listening on localhost, you don’t have to do any further settings.
If this is not true and you are on Azure or have different setup, you need to change the settings for each environment in Postman.
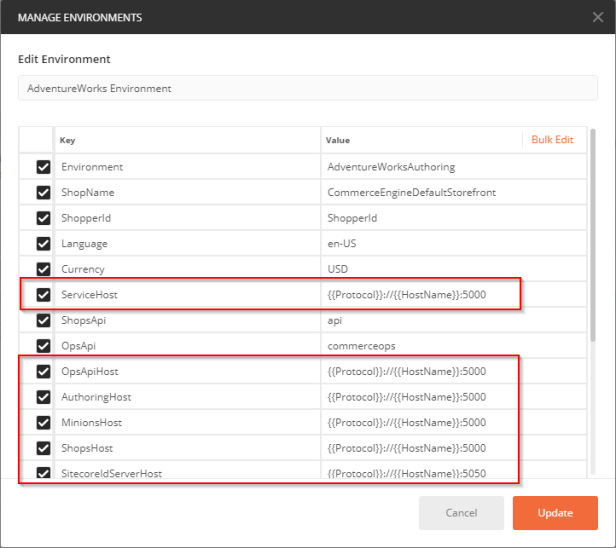
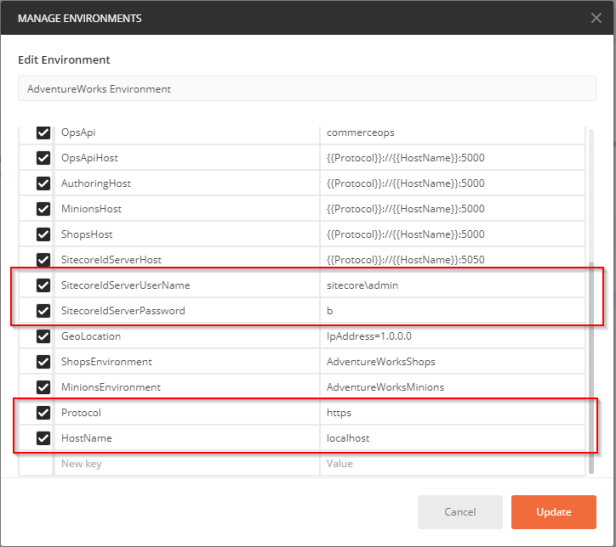
Go to environments settings and choose one of the environments:
Set highlighted settings based on your settings (ports 5000 and 5050 will be replaced probably by 443 when you are on Azure):
Step 6: Bootstrap Sitecore Commerce
Once you have done all other steps in this guide you are prepared to bootstrap Sitecore Commerce to apply all new settings.
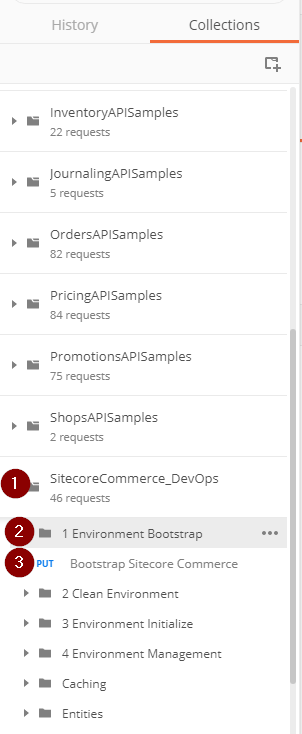
In Postman Collections pane, scroll all the way down to SitecoreCommerce_DevOps. Expand it and expand also “1 Environment Bootstrap” section. Click on “Bootstrap Sitecore Commerce”:
Click on the blue “Send” button to send the request. As you have security token, this operation should go through without any problem:

Conclusion
Postman is really great application to help all Sitecore Commerce developers not only to set up environments but debug possible issues.
Now it is the right time for you to explore other collections also and their possibilities.
Happy bootstrapping!

I love videos over reading. Thanks for that.
LikeLike
Will try to do more videos next year
LikeLike