
I have shown you how to prepare virtual machine and all prerequisites to be able to install Sitecore 9.0.1 in my previous post.
Today I will continue where I left last time and I will show:
– installation of Solr
– setting up Solr as Windows Service
– running Solr with SSL
UPDATE: This blog post will show you instructions how to manually install Solr and enable SSL. If you want to be much quicker and use just one simple Powershell script to achieve everything what is below in just couple of seconds, take a look on my blog post about installing Sitecore 9.1 where I mention much faster way! Just don’t forget to use Solr 6.6.2 version with that script 🙂 You will definitely like the script!
You can find more information about these topic further in installation guide (link can be found at the end of this article) in chapters 2.1.7 and 2.3.4.
Sitecore supports the following index providers:
- Solr 6.6.2 – For the XP Single (XP0), XP Scaled (XP1) and XM Scaled (XM1) topologies, Solr is the default search provider.
- Azure Search – The Azure Search provider is supported and recommended for Azure Cloud PaaS deployments only.
- Lucene
Solr is default search provider out of the box so you don’t need to configure anything or change any installation scripts. It is great choice for scaling in oppose to Lucene. It also does not require internet connection like Azure Search during development. Therefore for development purposes is Solr the best choice.
Let’s get started then.
1)
Download and install Java Runtine Environment 8 if you already don’t have it on virtual machine:
– http://www.oracle.com/technetwork/java/javase/downloads/index.html
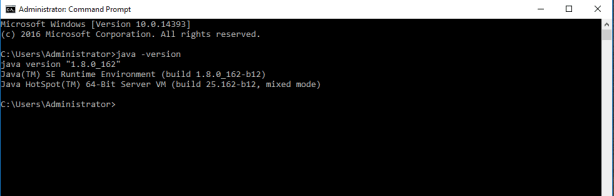
You can always verify whether java is installed by opening Command Prompt and running
java -version
command.
If it’s installed, you should see this:
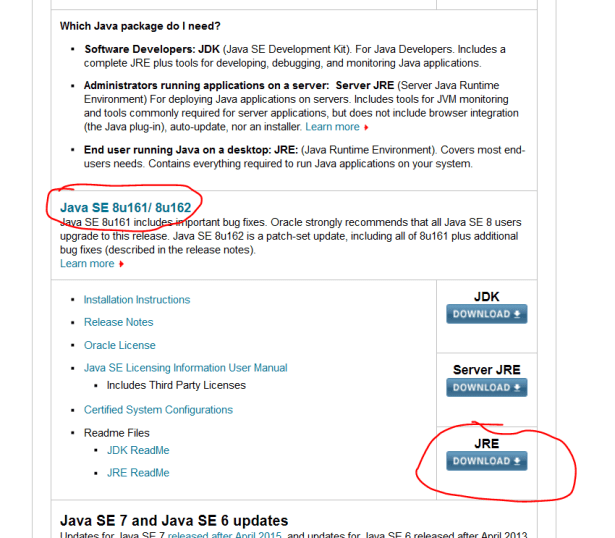
At the time of writing this blog post I have chosen this version – Java SE 8u161/ 8u162 of JRE on that page:
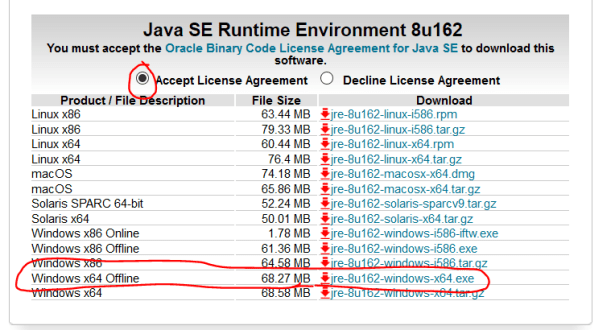
In the next page I have chosen JRE 8u162. You need to “Accept license agreement” and choose Windows x64 Offline:
Install this package by navigating through wizard. I have chosen default values.
2)
Download installation package of Solr from your nearby mirror:
– http://archive.apache.org/dist/lucene/solr/6.6.2/
3)
Unzip package downloaded in step 2 into folder C:\Solr\solr-6.6.2 on your VM. If you choose different location, adjust below-mentioned configuration and scripts accordingly.

4)
Let’s quickly check whether Solr is installed correctly by starting it.
– Open Command Prompt and navigate to Solr bin folder e.g. C:\Solr\solr-6.6.2\bin
– Run command
solr.cmd start
– Run command
solr.cmd stop -p 8983
You should see something similar on your screen:

We have now verified that Solr is correctly installed and can be run on port 8983.
5)
Running Solr as Windows Service.
I am always setting Solr to run as Windows Service and start with VM. This is saving me time as I don’t need to do it manually each Windows Server start and the biggest benefit – I don’t need to remember to do so! Automate as much as possible 😉
Download handle utility NSSM -> https://nssm.cc/download
Unzip files into your desired directory e.g. C:\nssm.
Open Command Prompt and run command to navigate to win64 subfolder:
cd C:\nssm\nssm-2.24\win64
Afterwards run this command:
nssm install Solr
This will open dialog for you:
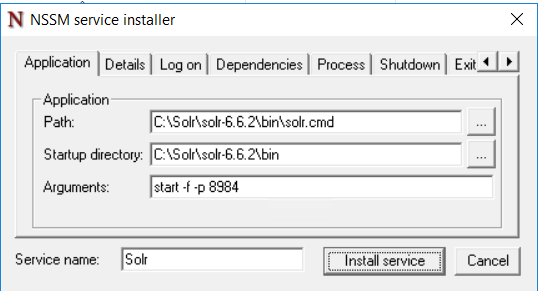
Specify path to your Solr cmd file in “Path” field and set “start -f -p 8984” in “Arguments” field.
I have changed here default port from 8983 to 8984. We will use SSL with Solr so I it’s always good to change default values so you are aware that something has been changed and it’s not ordinary.
Switch to “Details” tab and specify “Display name” and “Description” fields as you wish or according to my settings:

These values will be visible in “Services” application in Windows Server.
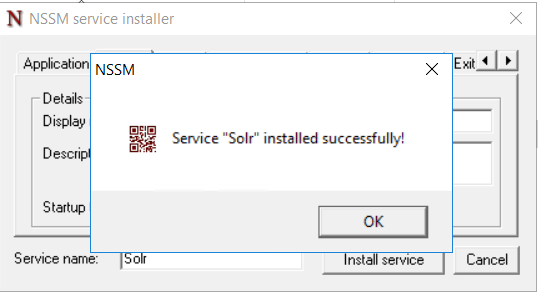
Hitting “Install Service” button will create Windows service for Solr and also open this dialog:
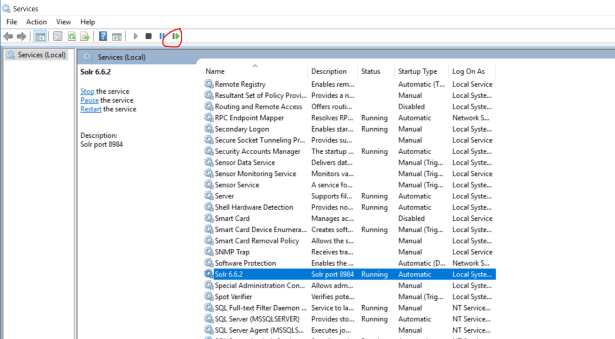
Open “Services” on Windows Server and verify that you have Solr service in list of services:

Run this service.
Open your favorite browser and navigate to http://localhost:8984/solr/ :
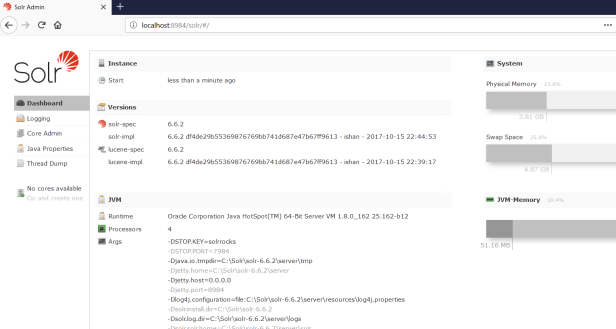
Everything is now prepared for last step before finishing setting up Solr for Sitecore 9.
6)
Running Solr on SSL
Download SolrSSL.ps1 from kamsar’s github repository.
You can also find this file in my repository together with other files that will be needed later on during installation.
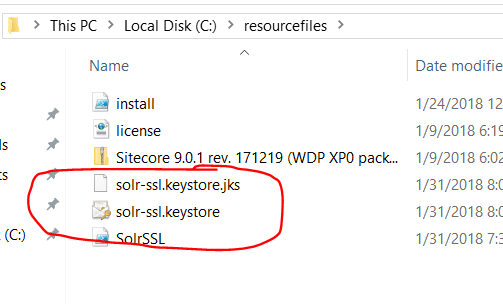
Copy this file to C:\resourcefiles\ folder.
Open PowerShell command prompt. Do not use Powershell ISE, it won’t work with it!
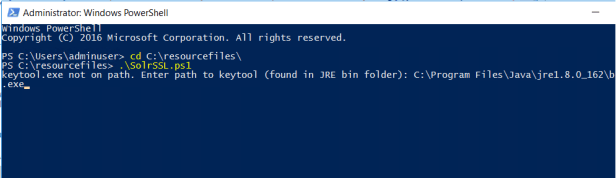
Specify full path to keytool located in your freshly installed JRE.
For me it was
C:\Program Files\Java\jre1.8.0_162\bin\keytool.exe
Mind “Next steps” warning at the end of script:
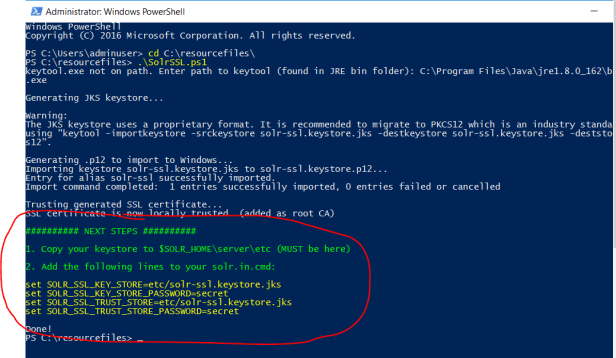
Follow highlighted instructions.
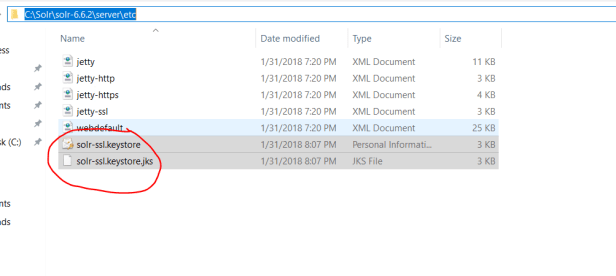
So from C:\resourcefiles move files with filenames starting with “solr-ssl.keystore”
to “C:\Solr\solr-6.6.2\server\etc”:
Navigate to C:\Solr\solr-6.6.2\bin and open solr.in.cmd in notepad or any other editor:
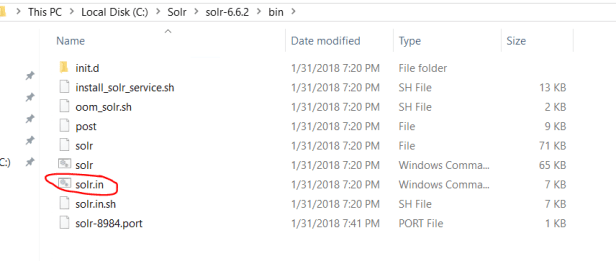
Paste following lines at the end of the file or basically anywhere in the file:
set SOLR_SSL_KEY_STORE=etc/solr-ssl.keystore.jks
set SOLR_SSL_KEY_STORE_PASSWORD=secret
set SOLR_SSL_TRUST_STORE=etc/solr-ssl.keystore.jks
set SOLR_SSL_TRUST_STORE_PASSWORD=secret
Appending these kind of changes is always best practice.
Now restart Solr service:
Open https://localhost:8984/solr/ in your browser.
Mind the https at the beginning instead of http and port 8984 instead if 8983.
Approve security exceptions and verify secret keystores in the log on dashboard page:

That’s it for today.
In my next post I will conclude this series with finally installing some goodies – Sitecore 9.0.1 🙂
——————————————————
Used sources:
