
Sitecore 9.2 Initial Release was released on 22nd July 2019. In this post I will walk you through really quick installation of this version of Sitecore for your development machine using SIF.
Easiness and smoothness of Sitecore installations are improving each version. With Sitecore 9.2 you have two options to install Sitecore on your local dev machine:
- Using good old SIF (Sitecore Installation Framework) which is used to install Sitecore starting version 9
- Using SIA (Sitecore Install Assistant) – New addition coming with Sitecore 9.2 – Take a look in my other blog post to see how to use this tool to install Sitecore
Above-mentioned options are official options supported by Sitecore. There are lot of other options to install Sitecore using community effort like SIFless and others.
As I mentioned earlier, this blog post will guide you through the installation of Sitecore 9.2 using SIF.
What you can find in this blog post:
- Sitecore 9.2 Prerequisites
- Installation preparation tasks
- The quickest Solr 7.5 installation
- Sitecore 9.2 Installation
Let’s get started then!
1) Sitecore 9.2 Prerequisites
You don’t need to install all these prerequisites (like .NET Framework) by yourself upfront as Sitecore 9.2 installation package will check and install all prerequisites for you. See chapter 4b) of this blog post. I just put them here for reference.
1a) OS
These operating systems are supported:
- Windows Server 2019
- Windows Server 2016 – my choice for Sitecore 9.2
- Windows 10 (32/64-bit)
1b) Database
This version supports these database servers:
- Microsoft SQL Server 2016 SP2 and 2017 – my choice was 2016 SP2
- MongoDB Server 4.0.5 – This is required if you are going to use MongoDB for the Experience Database (xDB) or as a Session State Provider.
Do not forget to enable contained databases in MS SQL Server!
In order to enable contained databases on SQL Server, run this SQL script through SQL Server Management Studio:
EXEC sp_configure ‘contained’, 1;
RECONFIGURE;
1c) Powershell
Microsoft PowerShell® version 5.1 or later is required.
To quickly check, you can always open a powershell command prompt and run the following command:
$PSVersionTable.PSVersion
1d) IIS
Only one version of IIS is supported:
- IIS 10
1e) .NET requirements
Sitecore XP 9.2 requires .NET Framework 4.7.2.
Sitecore Identity server requires .NET Core 2.1.7 Windows Hosting Module.
You must apply any available updates to the .NET Framework on every Sitecore installation.
2) Installation preparation
We will download all necessary installation files in this step.
2a) Download installation package
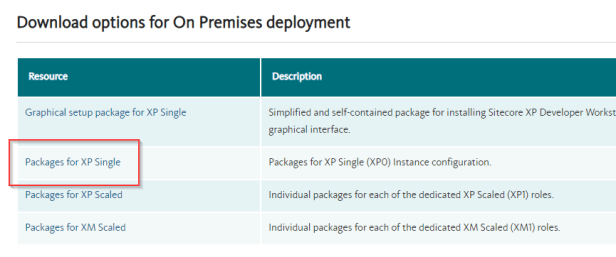
If you are planning to install Sitecore 9.2 on dev machine, click directly on this link to download installation package straight ahead or open https://dev.sitecore.net/Downloads/Sitecore_Experience_Platform/92/Sitecore_Experience_Platform_92_Initial_Release.aspx and download highlighted file with name “Packages for XP Single” (login is needed for download):
2b) Optional step – Download installation guide
If you are following this blog post, you actually don’t need to download it but just in case 🙂 Open https://dev.sitecore.net/Downloads/Sitecore_Experience_Platform/92/Sitecore_Experience_Platform_92_Initial_Release.aspx and download highlighted file manually:

There is no Installation Guide for XP Single as it was for previous versions. XP Single is de facto Developer Workstation also officially 🙂
2c) Prepare installation files
Extract downloaded zip file:

and then also extract highlighted XP0 Configuration files zip file to the same folder:
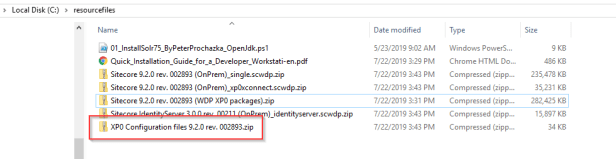
Installation folder should look now like this:

Copy into this folder also your license.xml file.
I have also renamed the OOTB ps1 file “XP0-SingleDeveloper.ps1” to “02_InstallSitecore_XP0-SingleDeveloper.ps1” just to have correct order of ps1 scripts to run. You can also download it from my GitHub repository with predefined values from this article together with uninstallation script.
Let’s do some house keeping and delete “XP0 Configuration files 9.2.0 rev. 002893.zip” and “Sitecore 9.2.0 rev. 002893 (WDP XP0 packages).zip” files from installation folder as they are no longer needed.
This is how it should look like before proceeding further:

3) Solr 7.5 Installation
This will be quick 🙂
If you have Solr 7.5 already installed, skip this chapter.
If you don’t, follow my other blog post to help you to do it in speed of light!
Let’s go to the final step and install Sitecore 9.2!
4) Sitecore 9.2 Installation
4a) Install SIF 2.1
Sitecore 9.2 supports newest version of SIF – Sitecore Installation Framework 2.1. This version needs Powershell 5.1 to run.
Open PowerShell as Administrator and run these two commands one by one:
Register-PSRepository -Name SitecoreGallery -SourceLocation https://sitecore.myget.org/F/sc-powershell/api/v2 -InstallationPolicy Trusted
Install-Module SitecoreInstallFramework -Force
Update-Module SitecoreInstallFramework
Last command will also install latest version of SIF side by side to existing version (if you have installed Sitecore 9.0 on the same machine before).
4b) Install Prerequisites
Open PowerShell Command Prompt as Administrator and navigate to “C:\ResourceFiles” folder or any other folder where you are doing the installation from.
Run this command to install all prerequisites:
Install-SitecoreConfiguration -Path .\Prerequisites.json
No more manual downloads or installations. Sitecore SIF will take care of that!
4c) Install Sitecore
Open “02_InstallSitecore_XP0-SingleDeveloper.ps1” file in your installation directory and check and edit parameters if necessary (especially ones I have highlighted) to suit your setup:
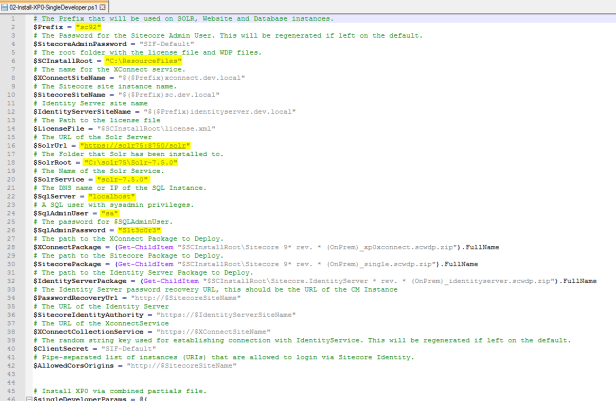
As you can see, I have copied the files into “C:\ResourceFiles” folder. I have also adjusted SQL server credentials and variables regarding Solr to suit my setup mentioned in this blog post. Don’t forget to save your changes before running script 😉
Open the script in PowerShell Command Prompt as Administrator and run it.
This is what you should get in couple of minutes:
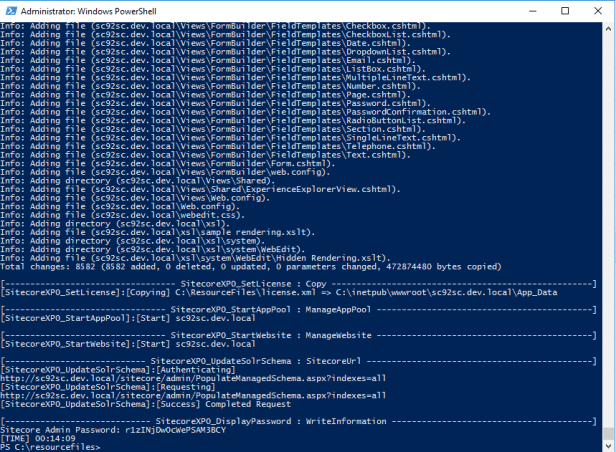
Mind the generated admin password at the end (third row from end). Default is not “b” as we were used to 🙂
This random password was generated by SIF as I haven’t specified different parameter in ps1 script for this variable and I kept it on default “SIF-Default”:
$SitecoreAdminPassword = "SIF-Default"
You can specify this param before running install script.
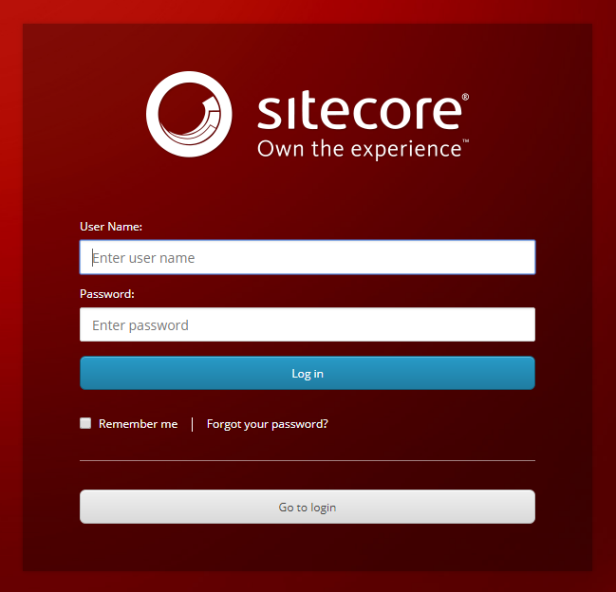
And finally I saw familiar Sitecore login screen:
and also Launchpad:
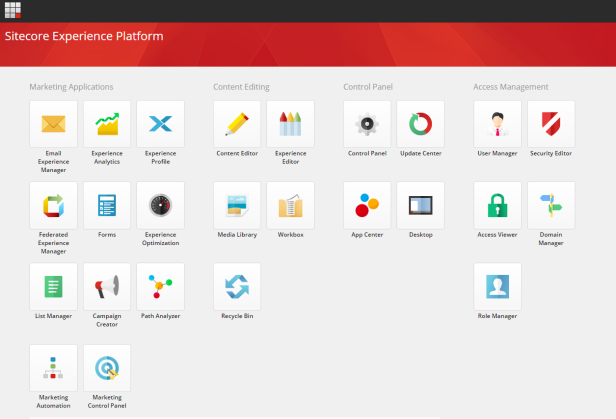
It was opened amazingly fast and also the performance of each application seems to be tuned up. Good job Sitecore!
I will definitely explore this more and publish some followup blog posts from my findings!
Stay tuned!
——————————————————
Used sources:
- Sitecore Experience Platform 9.2 Download page
- Quick Installation Guide For a Developer Workstation

I’m getting an error “The process cannot access the file because it is being used by another process” in the section “IdentityServer_StartWebsite”. Can you help me?
LikeLike
Take a look on answers for similar question asked on Sitecore StackExchange. You should find solution there -> https://sitecore.stackexchange.com/q/18078/2056
LikeLike
Thank you so much for this Peter, great script and really took the pain out off the install for me … took about 10 mins at most to run and worked perfectly first time. Thank you
LikeLike
Thanks for feedback. Glad it helped.
LikeLike