

I have recently found out a hidden gem called Default Hierarchy Links in Sitecore SXA and wanted to share this knowledge with you.
When you are adding new Link components onto pages this popup opens:
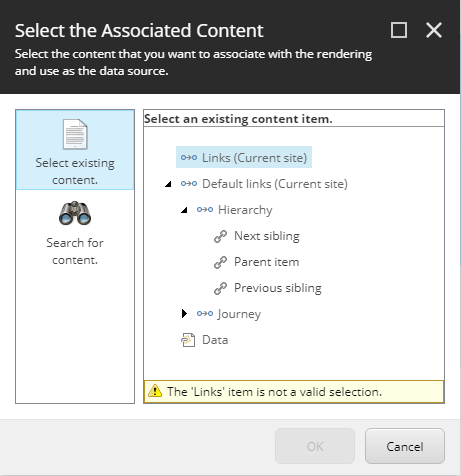
This post is about exactly those Hierarchy links (Next sibling, Parent item, Previous sibling) and I will show you in which scenarios you can use them.
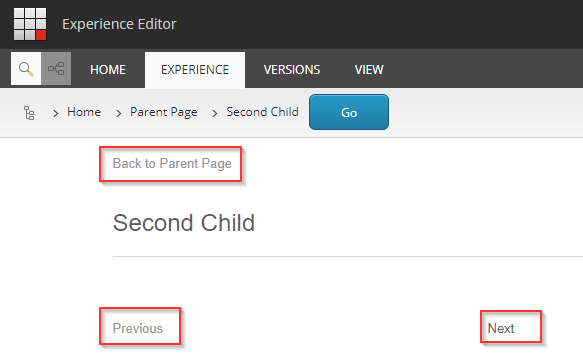
Sneak peak 🙂 You can build these kind of navigation elements on pages:
Some background
We were building a page where we should have “Back button” (to go to parent item) and pager functionality with Next/Previous buttons.
I thought that I will add Link component to the page for this and then figure out the rest.
I was really curious what are the options in the dialog when it opened:
I wouldn’t have expected that it will solve our requirements straight away 🙂
Solution
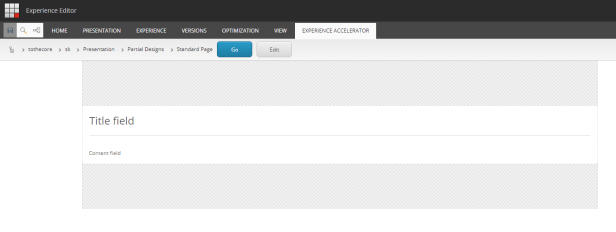
I will demonstrate this functionality on a Partial Design that I have created and has only “Title” and “Page Content” components so far:
Prepare Partial Design
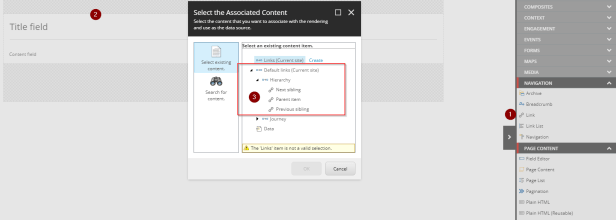
Let’s add a “Link” component from “Navigation” section from Toolbox. Drag and drop it before “Title” component and choose “Parent Item”:
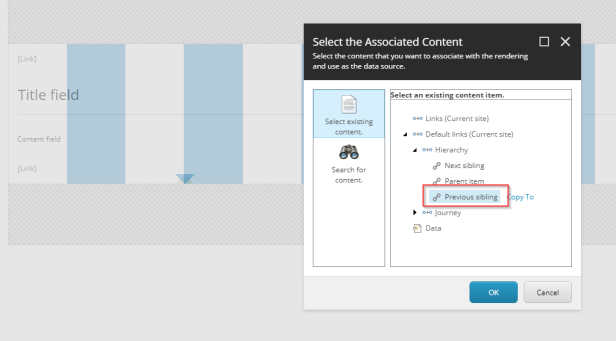
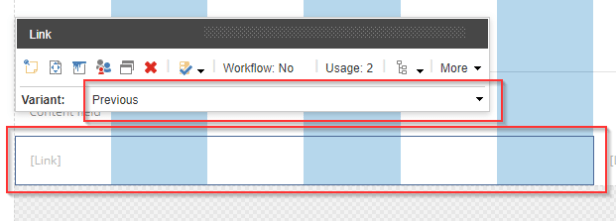
Add another “Link” component, this time below “Page Content” component and select “Previous sibling”:
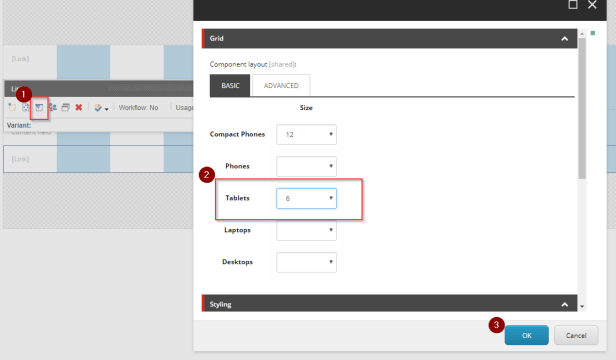
Change the styling to have Size 6 for tablets:
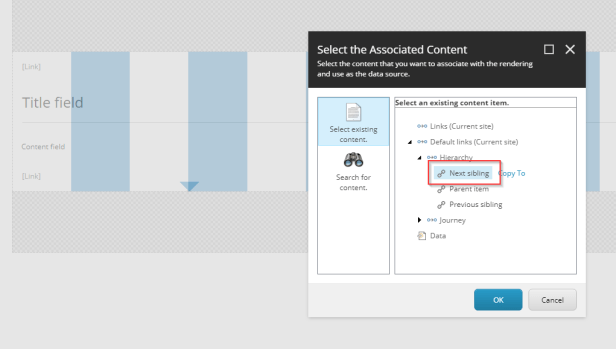
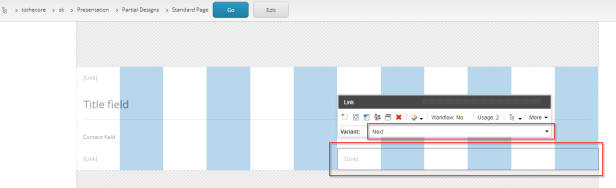
Add another “Link” component and this time below the previously added “Link” component and select “Next sibling”:
To recap, this is how your partial design should look like as of now:
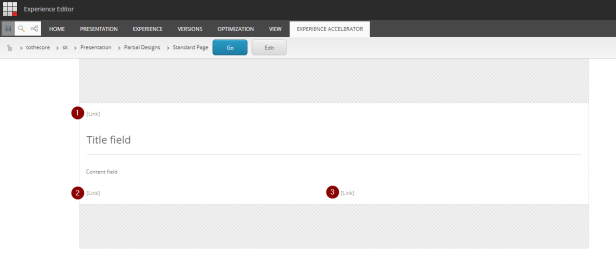
I have numbered the places where the links should have appeared.
Prepare Rendering Variants
I will show below how to create Rendering Variants for “Link” rendering/component. Obviously I did this just to quickly demonstrate you the functionality. Best would be to create separate / clone “Link” component and create these rendering variants there also in corresponding branch template. See my previous article about SXA extension / altering possibilities why should you do it this way.
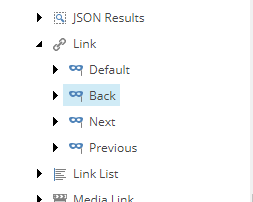
For now duplicate three times “Default” Rendering Variant for Link:
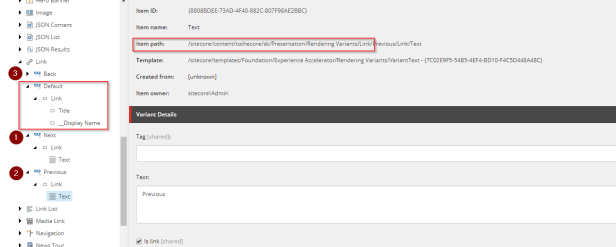
Name these duplicates “Next”, “Previous”, “Back”.
For all duplicates remove everything under Link subitem.
For “Next” and “Previous”, add variant “Text” underneath:

Keep “Tag” field empty and specify “Next” or “Previous” in “Text” accordingly. Check “Is Link”.
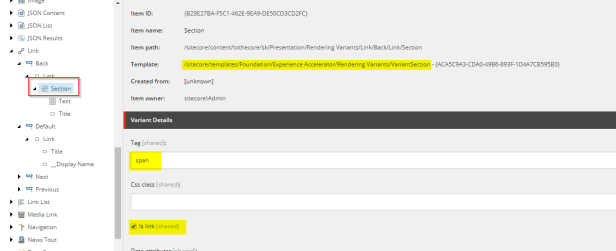
For “Back” add variant “Section” under Link and specify it like this:
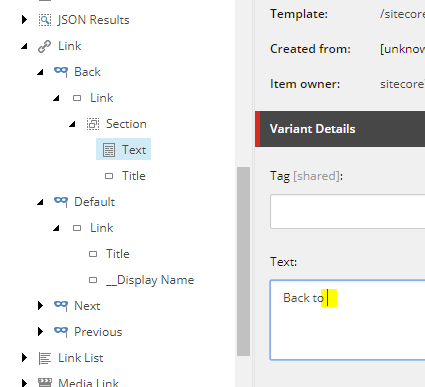
Add variant “Text” under Section and put desired text in “Text” field. I have chosen “Back to ”
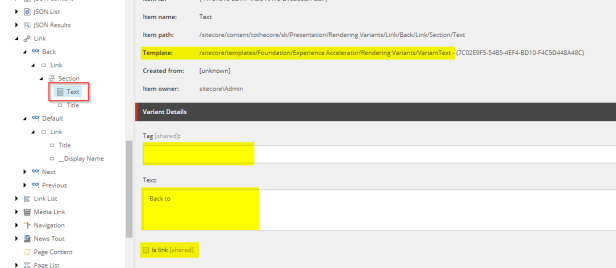
Mind the white space in “Text” field to nicely format output:
Add / specify “Title” field like this:
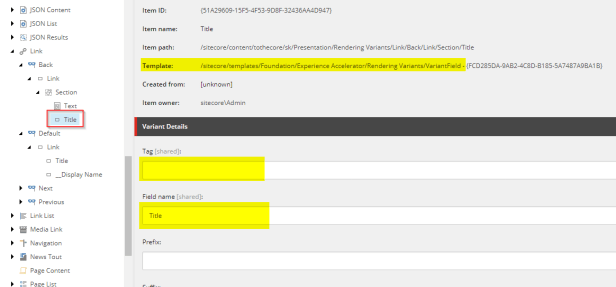
This could be solved with only “Title” field having Prefix defined but this is not generating proper HTML. In this case it would be something like below which was not desired for us. Better is to use above approach.
Pro Tip: As a last step, change the order of rendering variants and make “Default” first one in the list. This is necessary to keep existing functionality like it was and make “Default” really the default. SXA works the way that when rendering variant is not specified, it will fallback to first variant… Have this always in mind!
You should have it like this:
Setting proper rendering variants
We have already prepared partial design and rendering variants.
Now it is the time to set newly created rendering variants in our partial design.
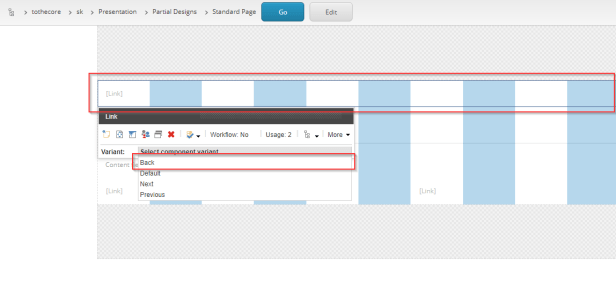
For the first / top link, select “Back” rendering variant:
For the bottom left link, select “Previous” rendering variant:
For the bottom right link, select “Next” rendering variant:
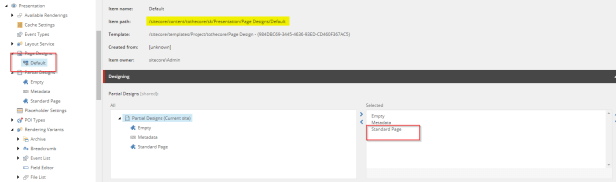
If you haven’t done so, select this Partial Design in your Page Design:
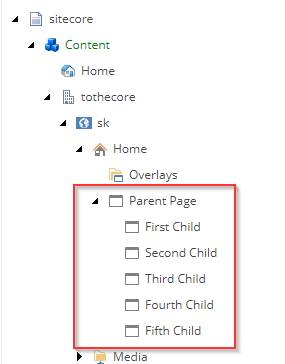
For demonstration purposes, I have created dummy structure of Pages like below. First one is “Parent Page” and it has five children:
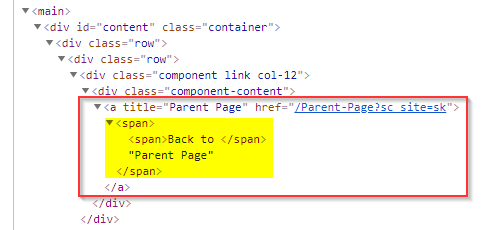
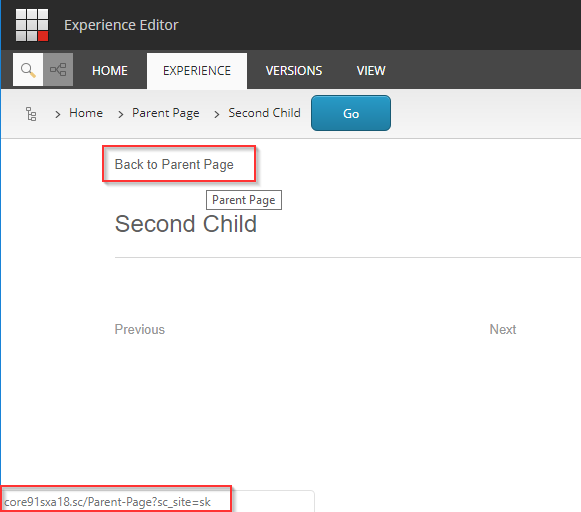
Open one of the pages – Second, Third or Fourth – and you will see that the back button has correct text and also URL generated. Text is partly “hard-coded” with “Back to ” text proceeded with title of parent item:
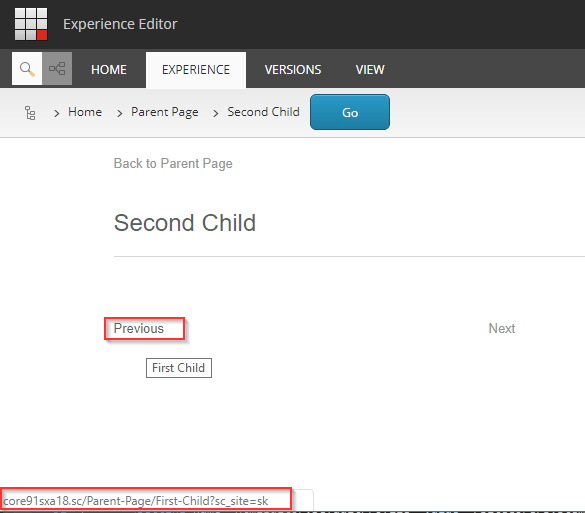
Also the previous:
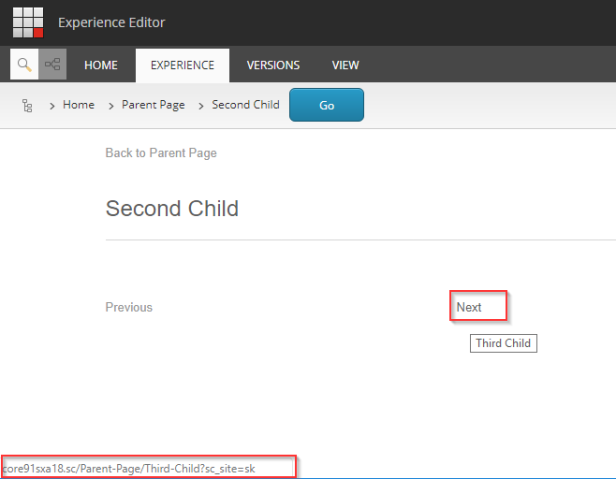
and Next:
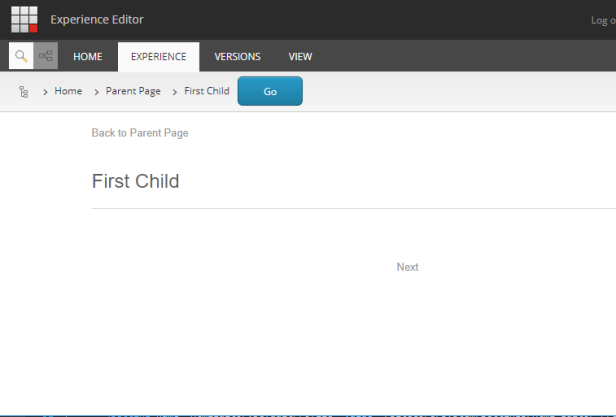
What is really cool is that for first and last page, it will only generate necessary links.
For first page, it will omit “Previous” as there is no other sibling item above in the hierarchy:
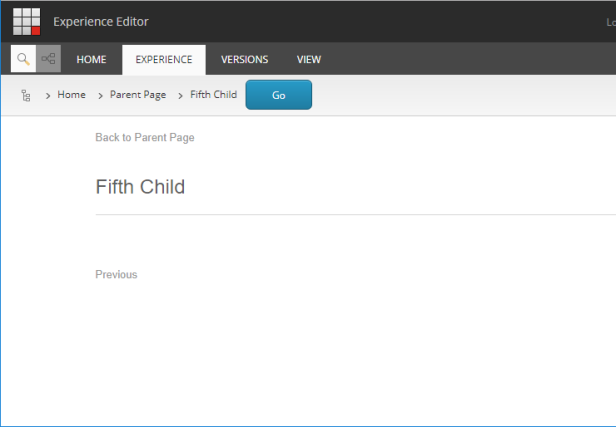
On the other hand for the last / fifth page, it will omit “Next” button as there is no other sibling item below:
How many times have you build something similar?
With SXA, piece of cake, right? 🙂
Happy varianting!

Thanks for sharing, interesting and hope will use Hierarchy sooner or later
LikeLike